# Partner Operations
# Distributor Group Management
- [How to Create a Distributor Subgroup](#bkmrk-how-to-create-a-dist)
- [How to Promote an Existing Group to a Distributor Subgroup](#bkmrk-how-to-promote-an-ex)
- [How to Disassociate a Subgroup from its Parent Distributor](#bkmrk-how-to-disassociate-)
- [How to Upload the Reseller Subgroup agreement](#bkmrk-how-to-upload-the-re)
- [How Reseller Subgroups can Register their Own Deals](#bkmrk-how-reseller-subgrou)
- [How a Distributor can Approve/Reject/Renew a Reseller Subgroup’s Deal](#DistributorGroupManagement-HowaDistributorcanApprove/Reject/RenewaResellerSubgroup%E2%80%99sDeal)
- [How a Reseller Subgroup Deal is completed](#bkmrk-how-a-reseller-subgr)
- [How a Distributor can View their Pricing for a Reseller Subgroup’s Deal](#DistributorGroupManagement-HowaDistributorcanViewtheirPricingforaResellerSubgroup%E2%80%99sDeal)
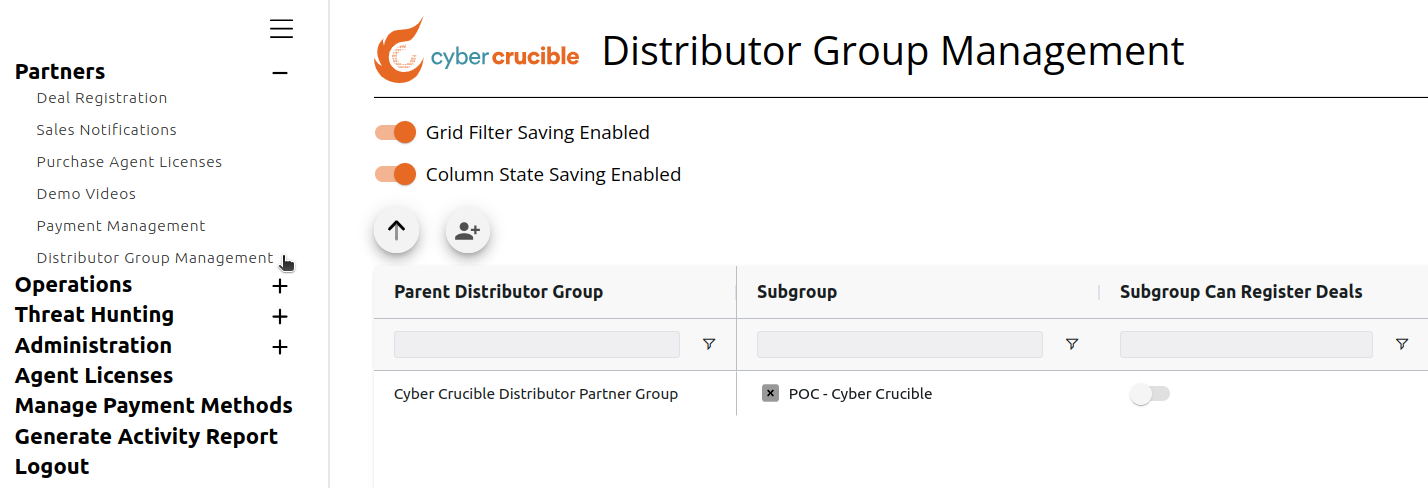
The Distributor Group Management page can be found in the sidebar under the Partner Portal. This page is only available to partners who are members of a Distributor Partner Group. On this page, partners can view/manage all of their current distributor subgroups, create subgroups, and promote existing groups as subgroups. Once distributors setup their subgroups, the subgroups are then able to register their deals on the Deal Registration page.
# How to Create a Distributor Subgroup
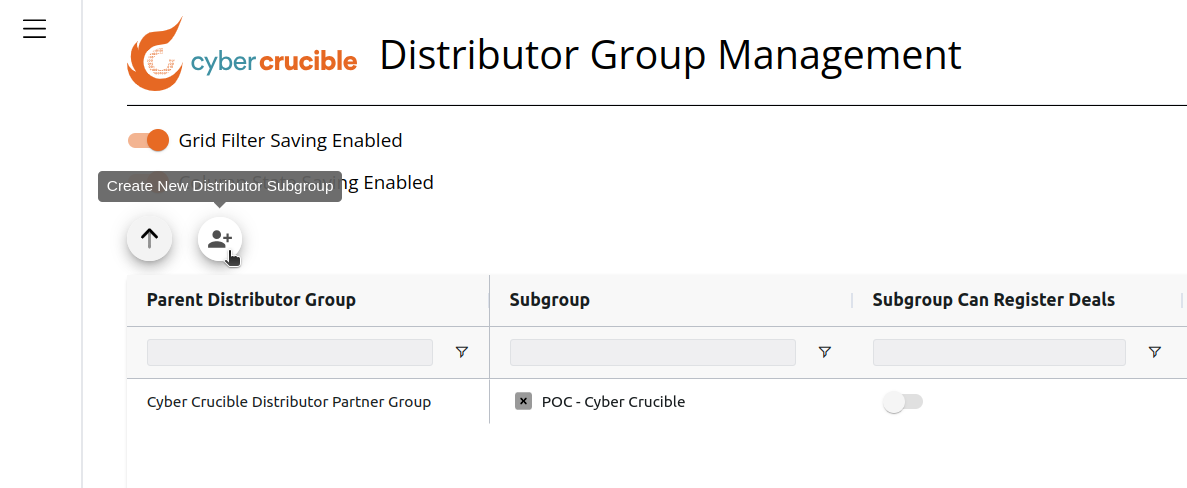
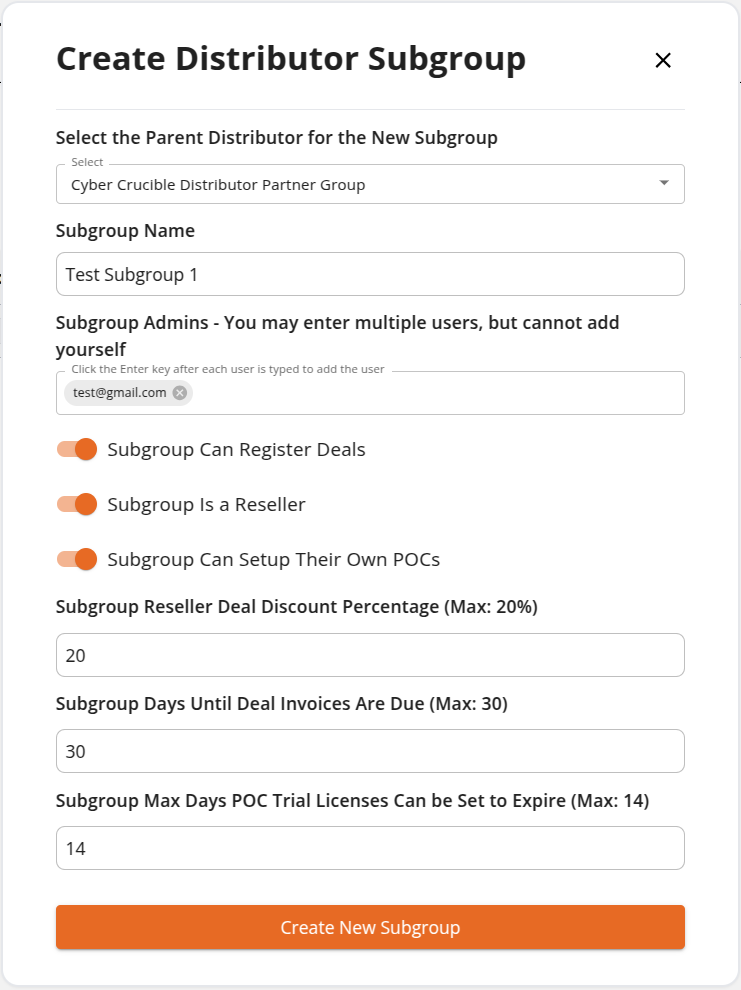
Partners can create a new subgroup of a distributor partner group by clicking the create subgroup icon above the grid, which will open a modal to fill out the new subgroup information. You also are able to select if the subgroup will be able to register deals of their own or not and set the relevant percentages for the type of deals they can register. Note that the user who creates the subgroup will not be added to the subgroup by default, members of the subgroup must add you to the subgroup if this is the desired outcome.
# How to Promote an Existing Group to a Distributor Subgroup
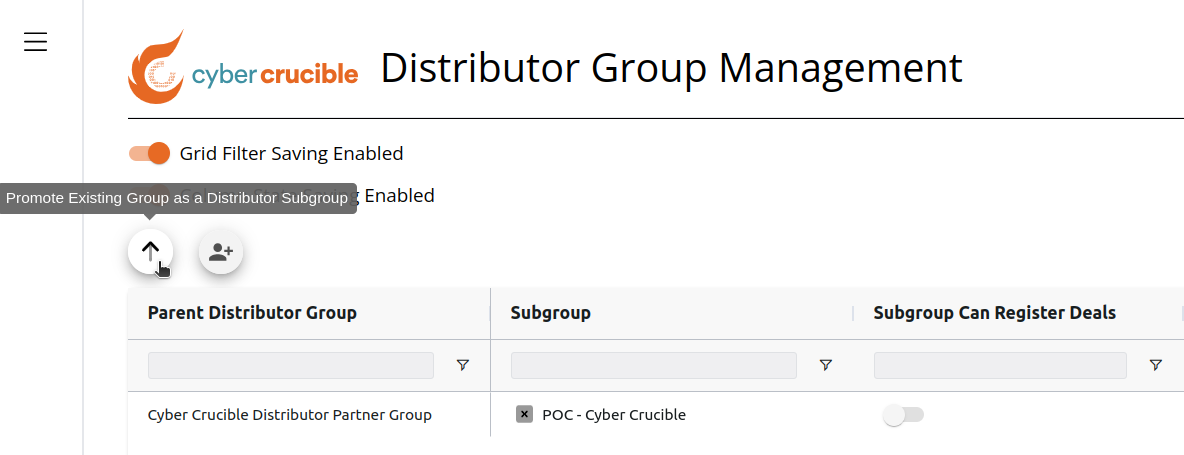
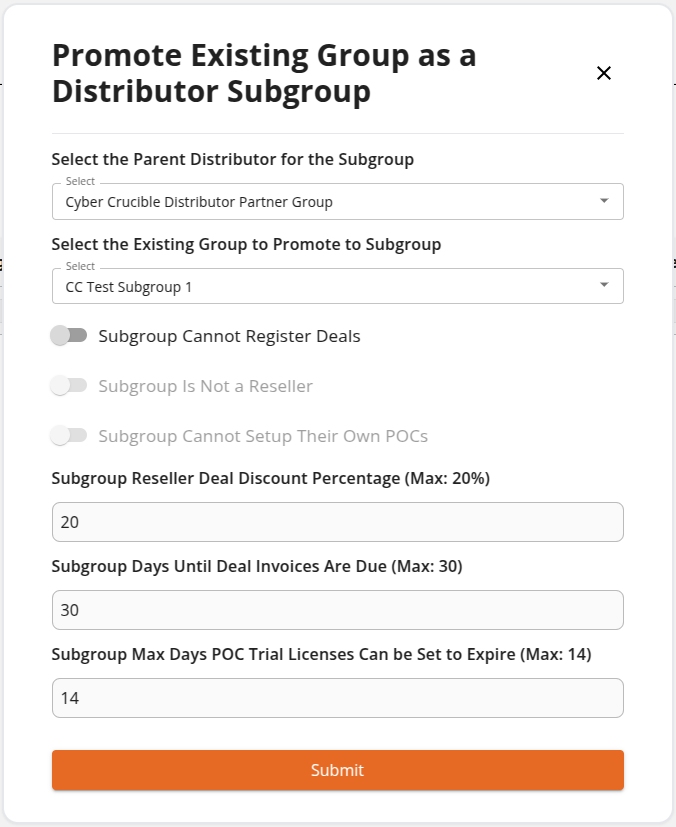
Partners can promote an existing group to a distributor subgroup by clicking the promote icon above the grid. Clicking this icon will open a modal very similar to the create new distributor subgroup modal where you can select the existing group to promote to a subgroup.
Note that you must be a member of the existing group to see it in the list of options, and existing groups already assigned to a parent distributor group will not be shown in the options.
# How to Disassociate a Subgroup from its Parent Distributor
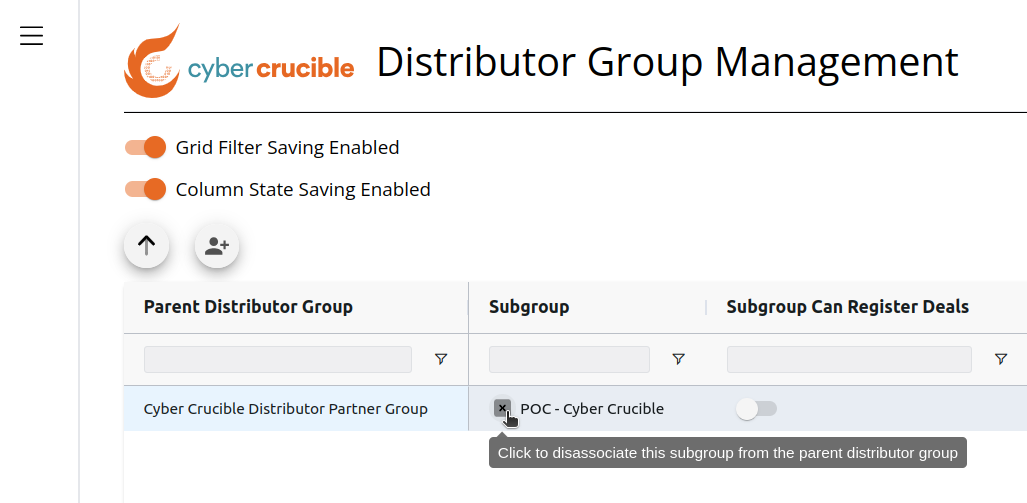
In order to disassociate a subgroup from its parent distributor group, find the subgroup on the grid and click the x icon next to the subgroup name.
# How to Upload the Reseller Subgroup agreement
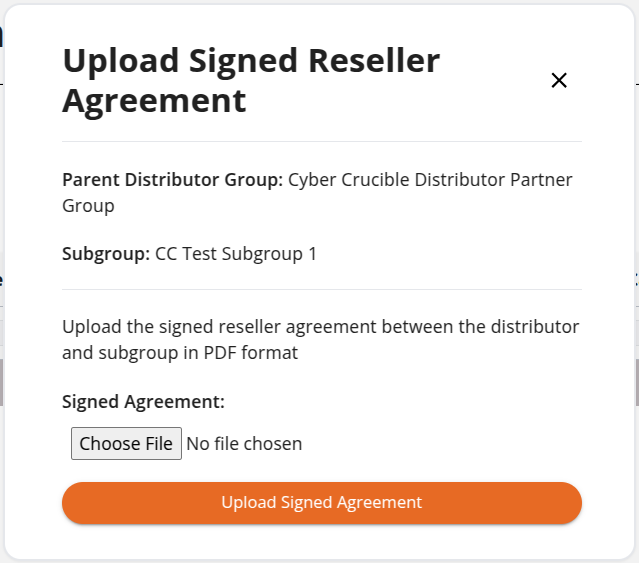
Once the distributor has setup their subgroup and has specified that the subgroup should be able to register their own deals, the distributor will need to upload the signed subgroup reseller agreement. The subgroup will not be able to register a deal without this agreement uploaded.
On the Distributor Group Management Page, click the upload icon in the Subgroup Reseller Agreement column for the desired row/subgroup.
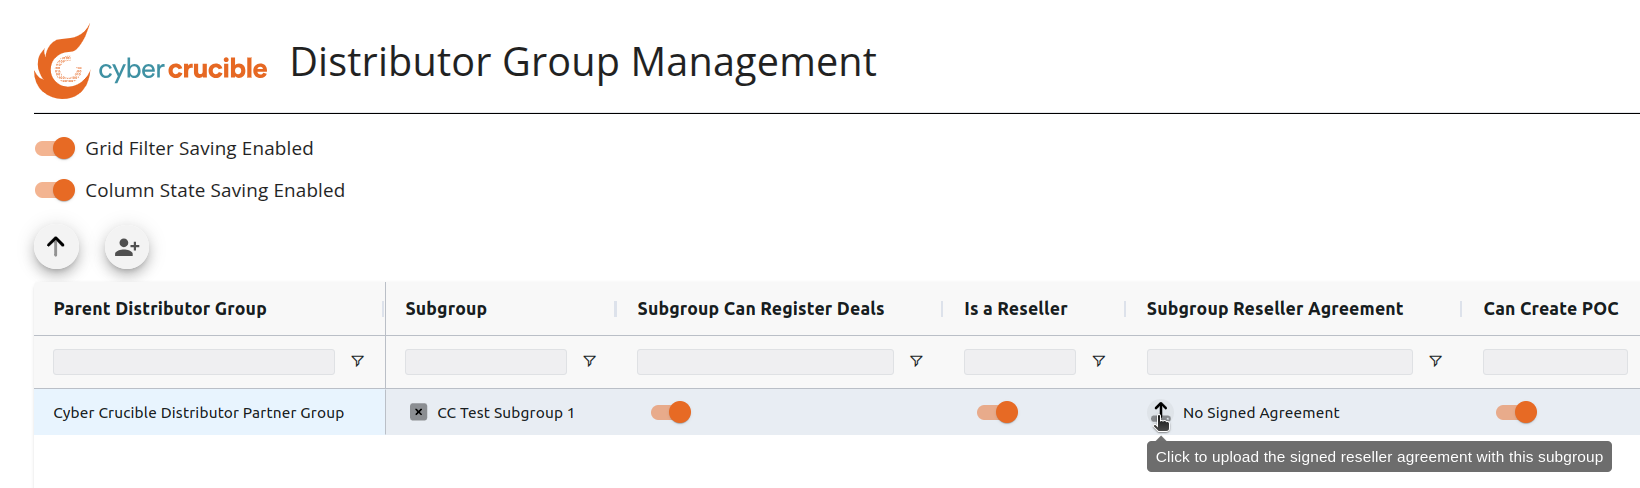Clicking this icon will open the modal below where the user can upload the agreement.
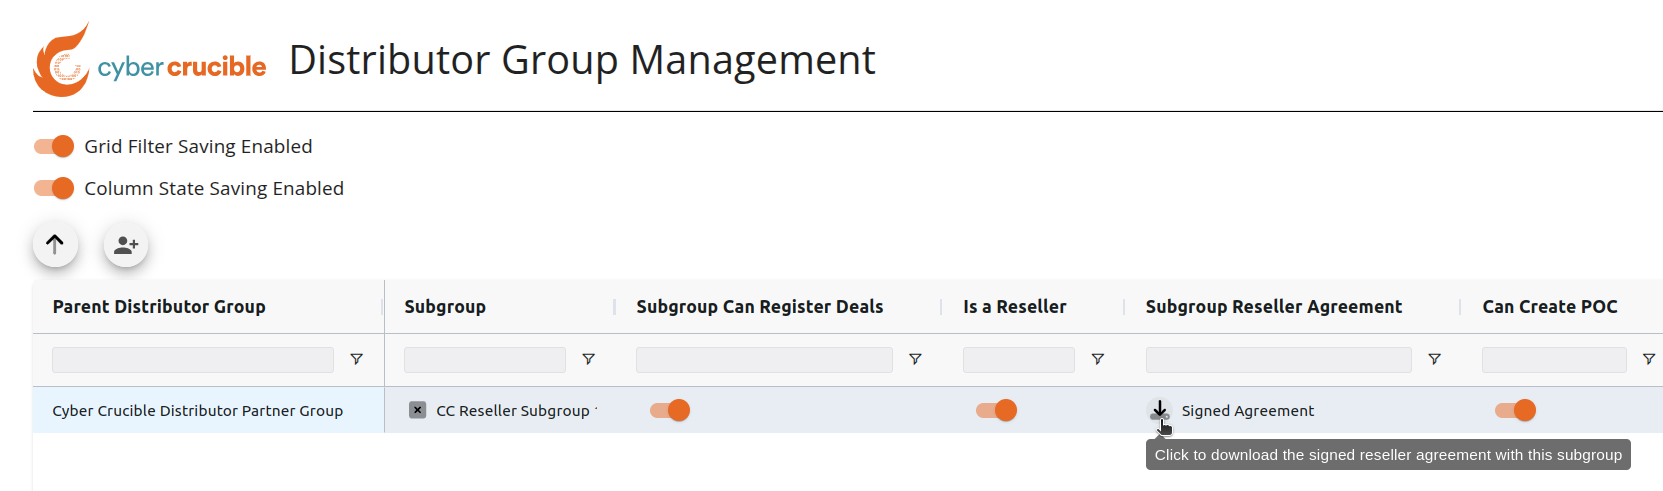
After uploading the agreement, distributors can view the document in the Subgroup Reseller Agreement column by clicking the download icon.
# How Reseller Subgroups can Register their Own Deals
After the distributor has setup their subgroups as reseller subgroups and uploaded the signed subgroup reseller agreement (see the “How to Upload the Subgroup Reseller agreement” section above), the reseller subgroup can now register deals on the Deal Registration page found under the Partners section in the sidebar.
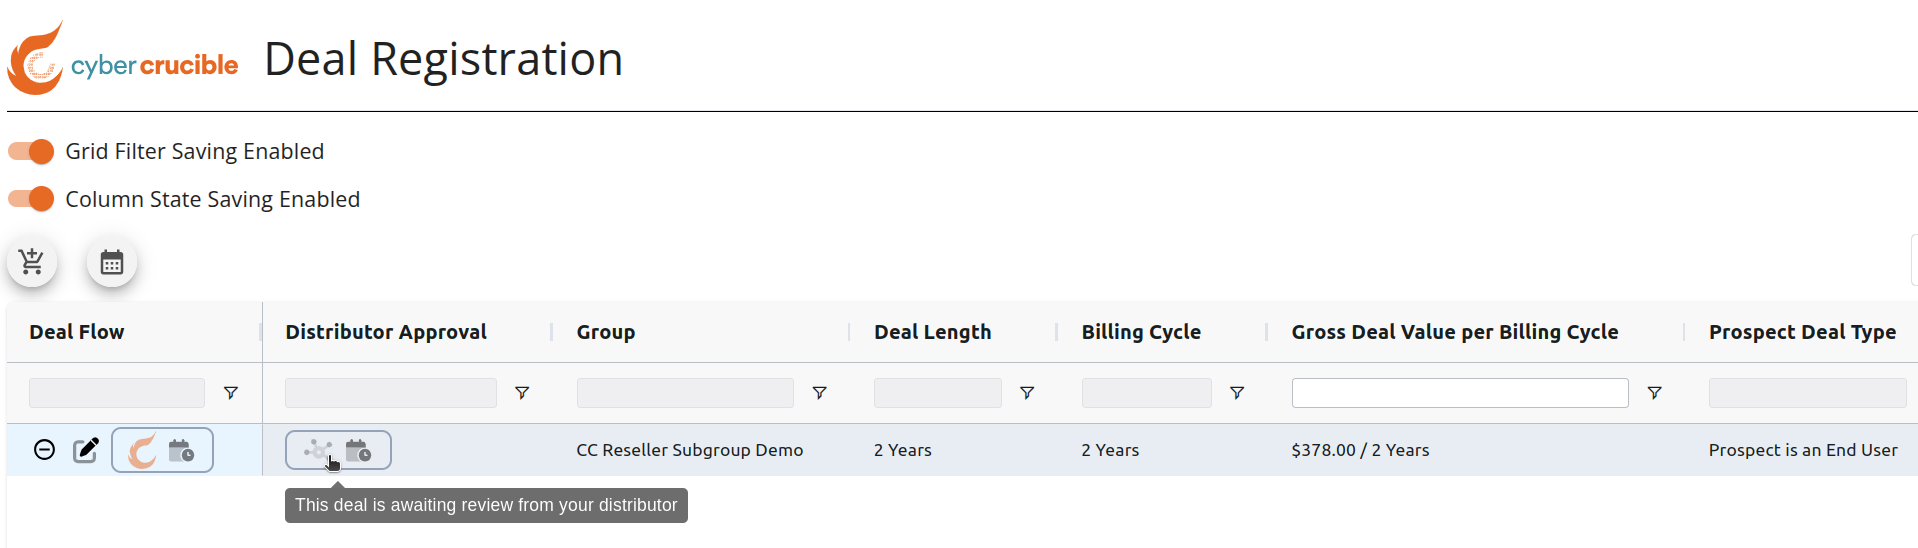
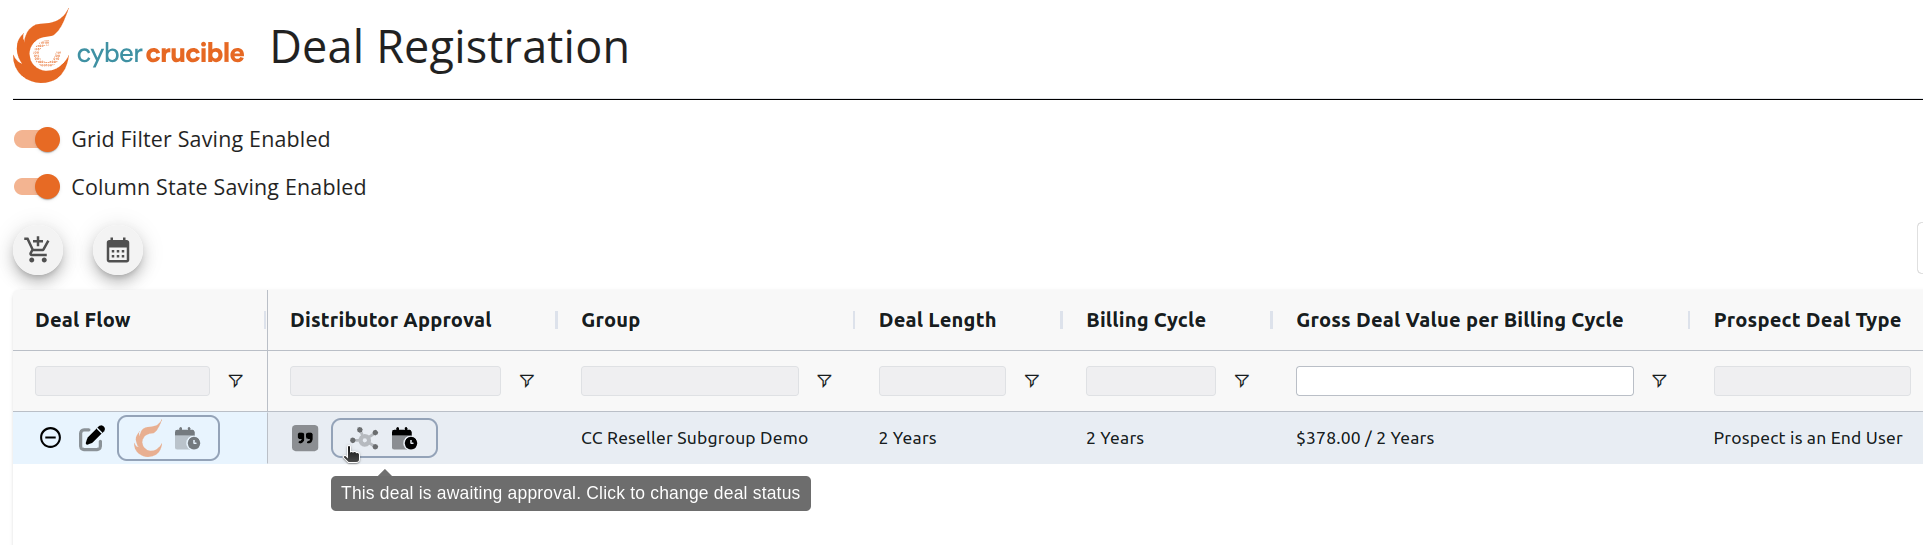
The reseller subgroup can register the deal for their end user like normal as explained [here](https://cybercrucible.atlassian.net/wiki/spaces/CYB/pages/49774593/Partner+Deal+Registration#How-to-Register-a-Deal). After the reseller subgroup registers the deal, the deal need to be approved by the reseller’s distributor and Cyber Crucible before the deal can move forward. When the distributor goes to the Deal Registration page, they will be able to see all of their reseller subgroup deals on the grid even if they are not a member of the subgroup.
Subgroup’s view of a pending Deal:
Distributor’s view of a pending Deal:
# How a Distributor can Approve/Reject/Renew a Reseller Subgroup’s Deal
A distributor can approve/reject/renew a deal from their reseller subgroup by going to the Deal Registration page and clicking the icon in the Distributor Approval column for the desired deal and clicking the desired outcome:
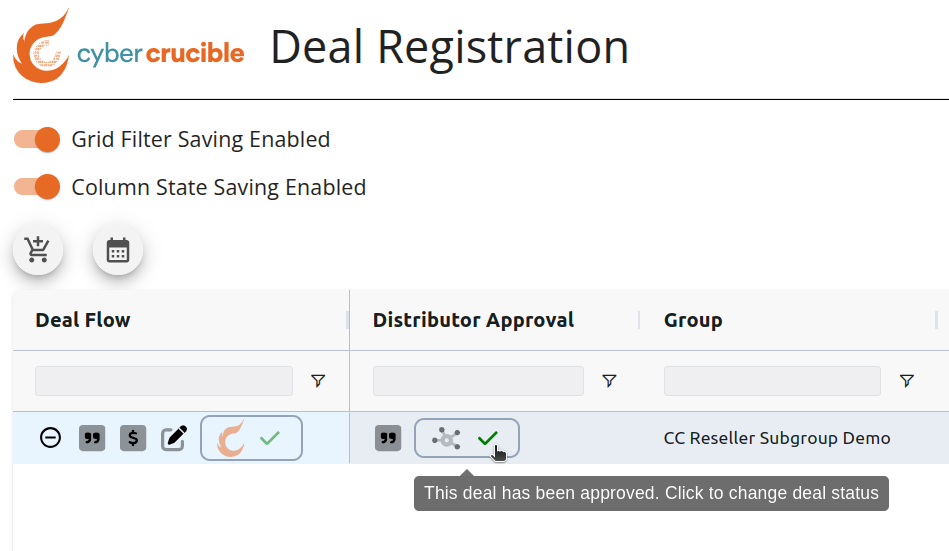
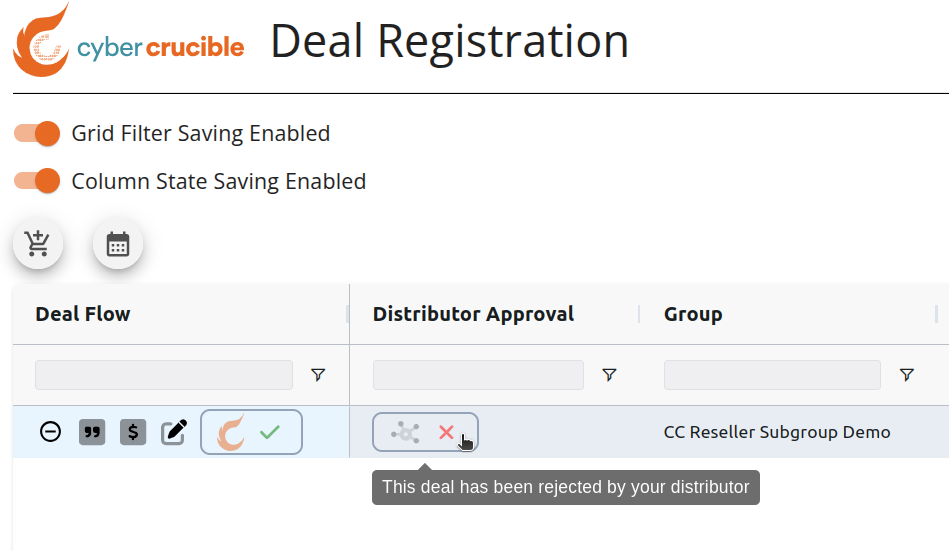
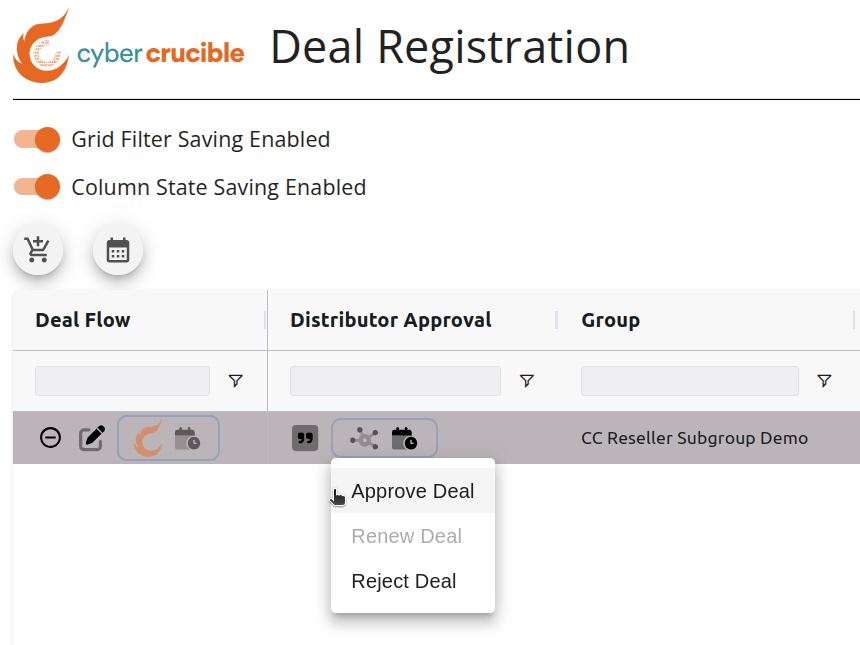After the distributor changes the status of the deal, a green check mark or red x will appear in the Distributor Approval column.
Distributor view of an approved deal:
Subgroup’s view of a rejected deal by the distributor:
# How a Reseller Subgroup Deal is completed
After a reseller subgroup’s deal is approved by both their distributor and Cyber Crucible, the deal now is able to be completed on the Deal Registration page. The reseller subgroup should click the Pay for Deal icon in the Deal Flow column for the desired deal when the deal is ready to be completed.
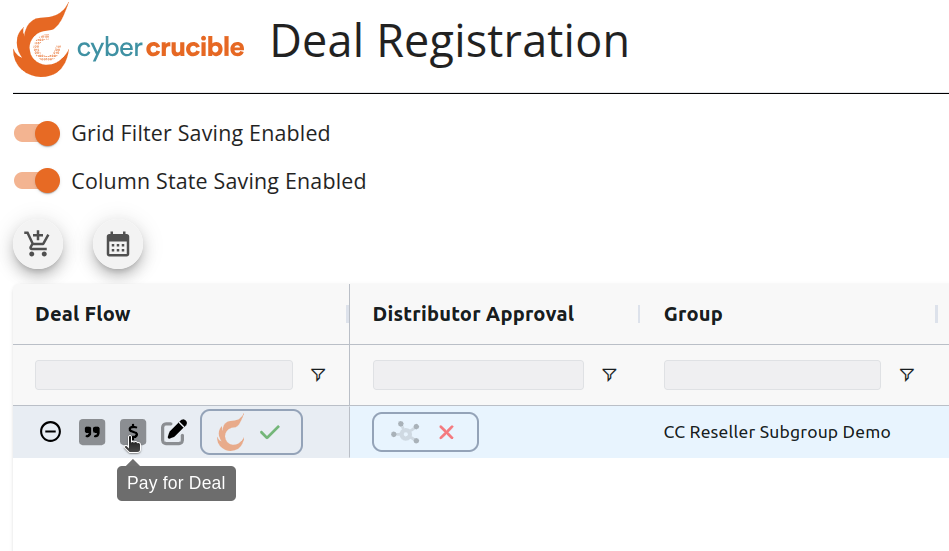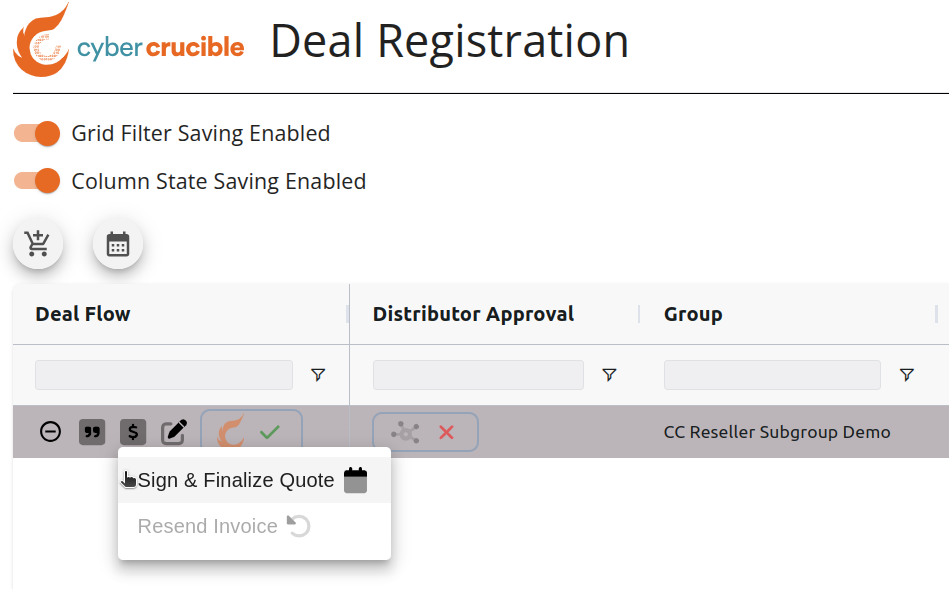After the reseller subgroup clicks the Sign & Finalize Quote option, Cyber Crucible will receive an alert that the deal is ready to be completed.
Cyber Crucible will get the final quote signed by the distributor according to the distributor’s pricing with Cyber Crucible. In other words, Cyber Crucible will bill the distributor, and the distributor will bill the reseller subgroup for the deal outside of Cyber Crucible’s dashboard according to the pricing agreed upon between the distributor and reseller subgroup.
After the distributor signs the final quote, the licenses for the deal will be created and placed into the reseller subgroup’s group, the reseller subgroup should distribute the licenses to their end user accordingly.
# How a Distributor can View their Pricing for a Reseller Subgroup’s Deal
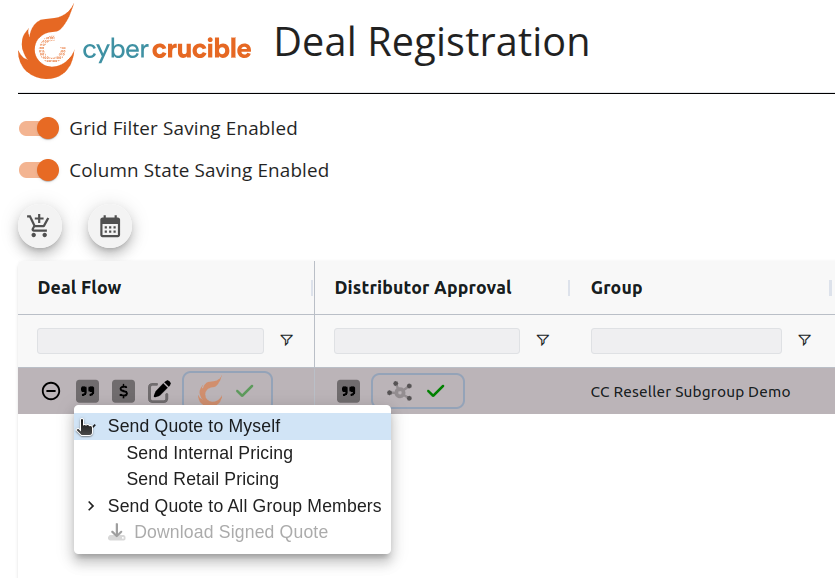
A distributor can view a quote with their distributor pricing for a reseller subgroup’s deal by going to the Deal Registration page and clicking the quote icon in the Distributor Approval column. The internal pricing will show the pricing according to the pricing agreed upon between the distributor and Cyber Crucible, the retail pricing will show no discount in the quote. Also note that clicking the Send Quote to All Group Members option inside the Distributor Approval column will send the quote to all the members of the Distributor Group, not the Reseller Subgroup.
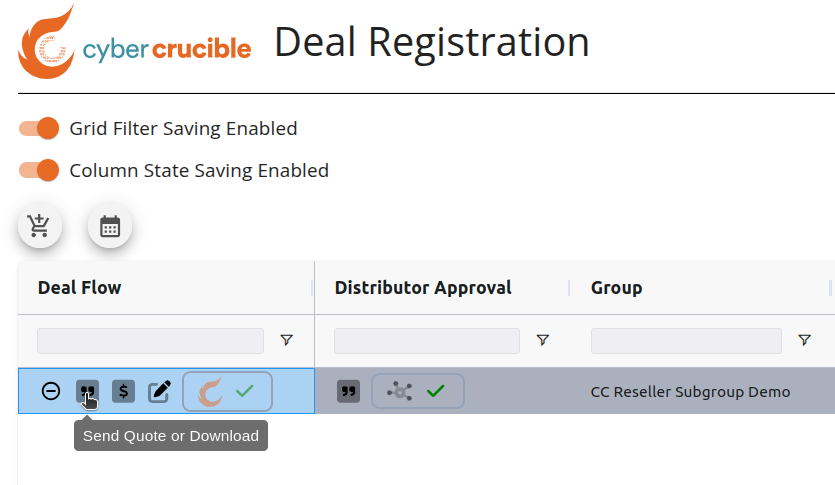
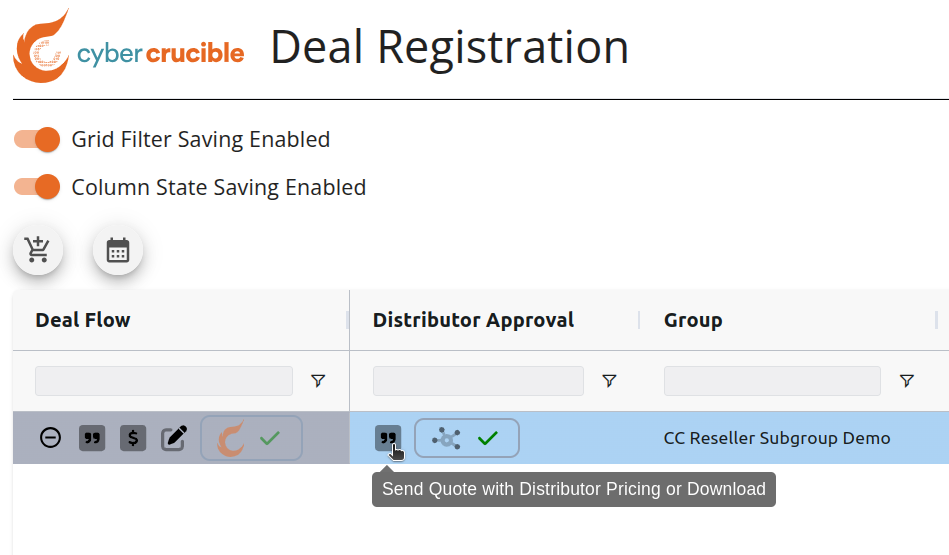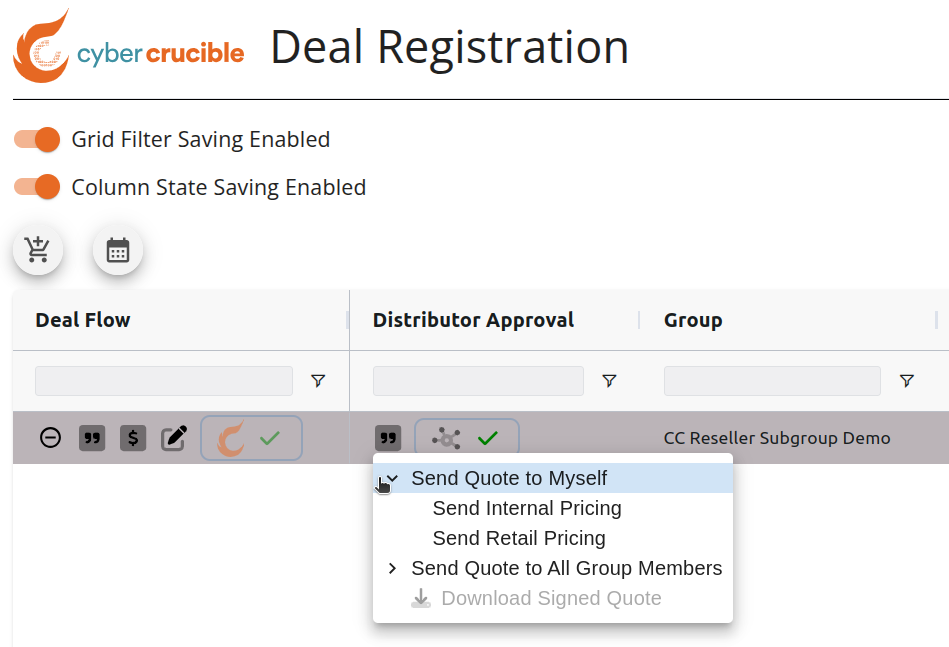Note that if a distributor wants to see the quote with the reseller subgroup’s discount, they can click the send quote icon like normal in the Deal Flow column. Note that the distributor user does not need to be a member of the subgroup to view the reseller subgroup pricing quote. Clicking the Send Quote to All Group Members in the Deal Flow column will send the quote to all the members of the reseller subgroup, not the distributor group.
# How to Create a POC for a Deal
- [Creating the POC](#bkmrk-creating-the-poc)
- [Where Can I View the POC Licenses?](#bkmrk-where-can-i-view-the)
- [Where Can I View the POC Group?](#bkmrk-where-can-i-view-the-1)
# Creating the POC
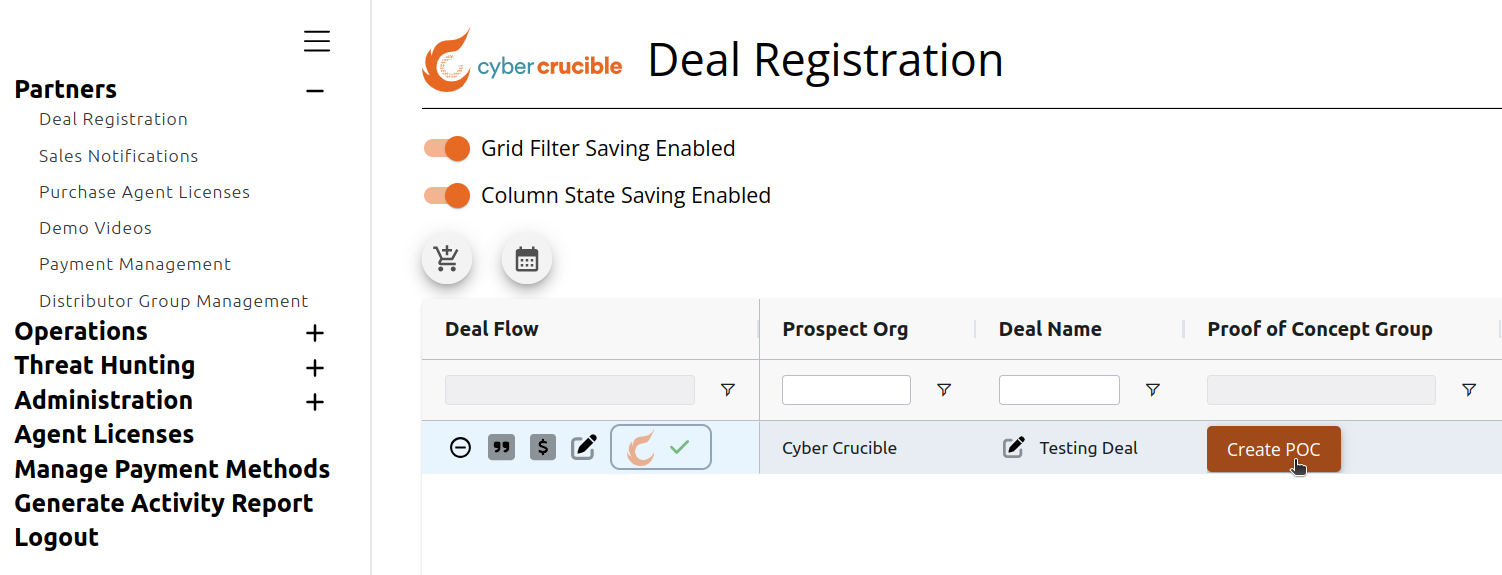
Partners can create a POC for a deal by first visiting our [Dashboard](https://dashboard.cybercrucible.com/login) and clicking the Deal Registration tab in the Partner Portal. Then, click the Create POC button for the specific deal in the Proof of Concept Group column, which will open the POC Setup modal. Note that in order to create a POC for a deal, the deal must already be registered and approved by Cyber Crucible, and the partner group for the deal must be given permission by Cyber Crucible to create a POC.
Please see the Partner Deal Registration article [here](/books/Partner-Operations/page/Partner-Deal-Registration) for how to register a deal and how you will know when a deal has been approved by Cyber Crucible.
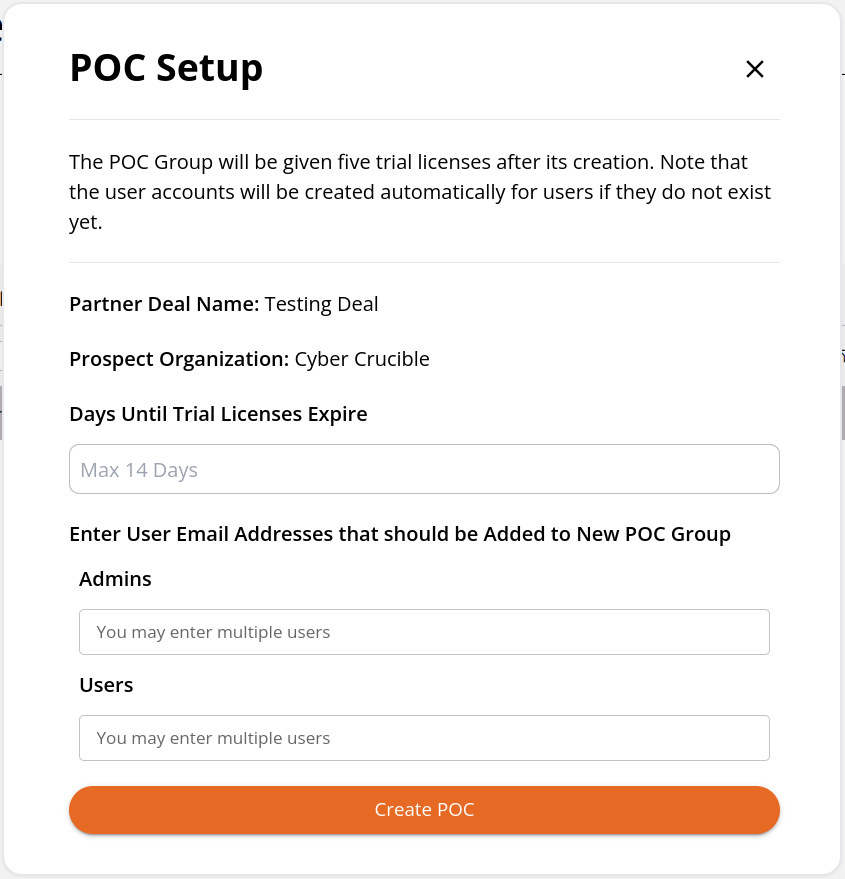As specified in the POC Setup modal, the POC Group will be given five trial licenses after its creation. You can specify how long the trial licenses should last (up to the max amount). You can also enter the Admin and Non-Admin users that should automatically be added to the POC Group upon creation. Please note that the user who is creating the POC Group will automatically be added as an Admin of the POC Group.
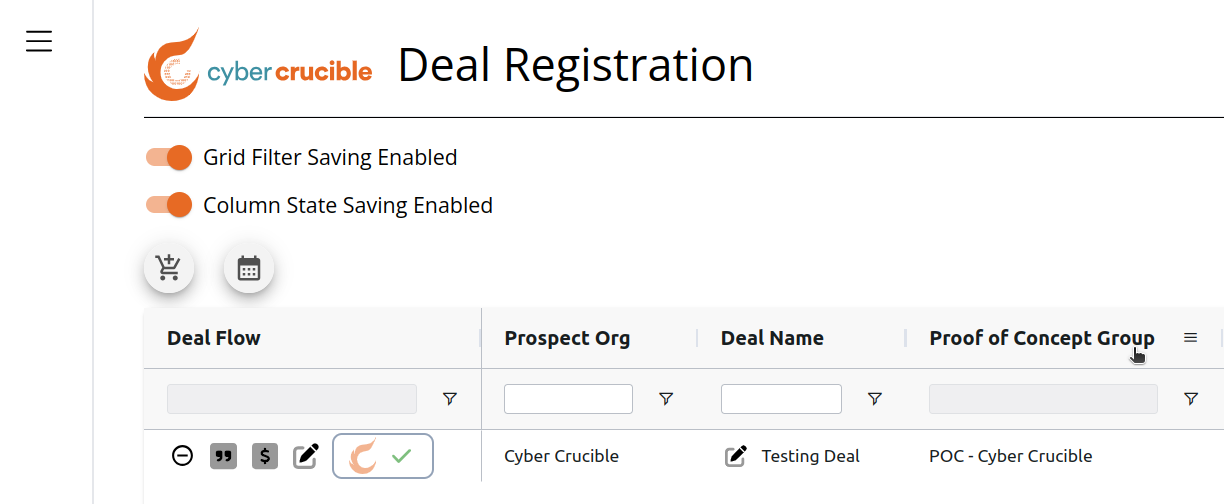
After the POC is created, the Proof of Concept Group column will appear as:
# Where Can I View the POC Licenses?
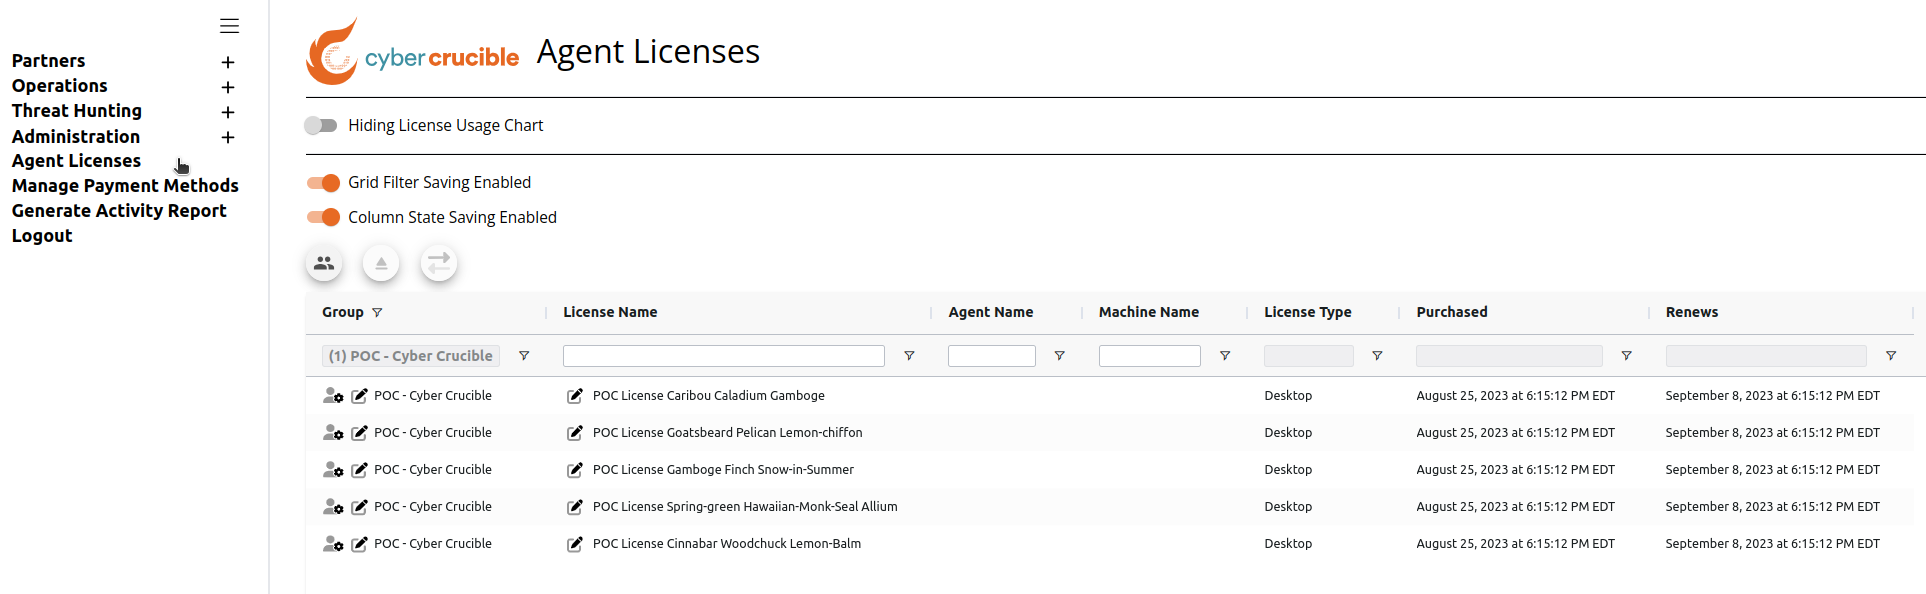
After the POC Group is created, users can view the POC Licenses on the Agent Licenses page.
# Where Can I View the POC Group?
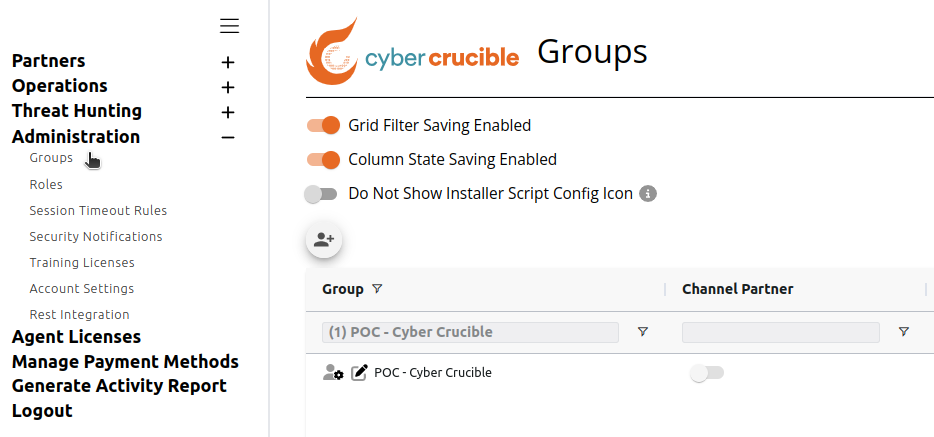
After the POC Group is created, users can view the POC Group on the Groups page under the Administration tab in the sidebar.
# How to Manage Payments and Subscriptions
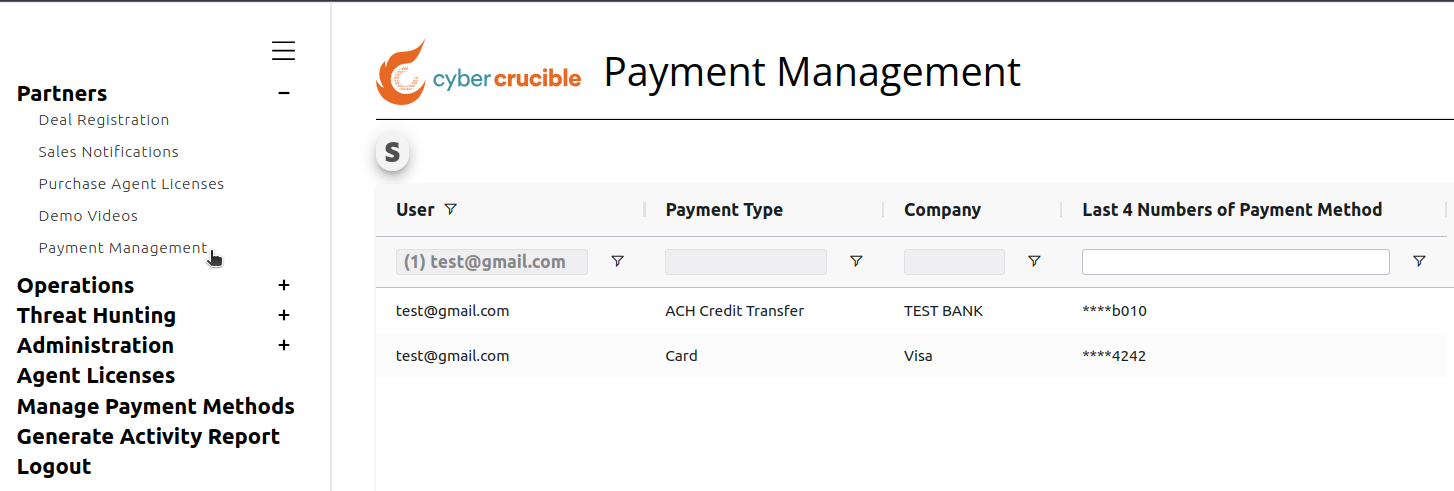
Partners can manage payments and subscriptions by visiting our [Dashboard](https://dashboard.cybercrucible.com/login) and clicking the Payment Management tab in the Partner Portal. This will take you to the Payment Management page where you will be able to see user payment methods in partner groups that you are an Admin of.
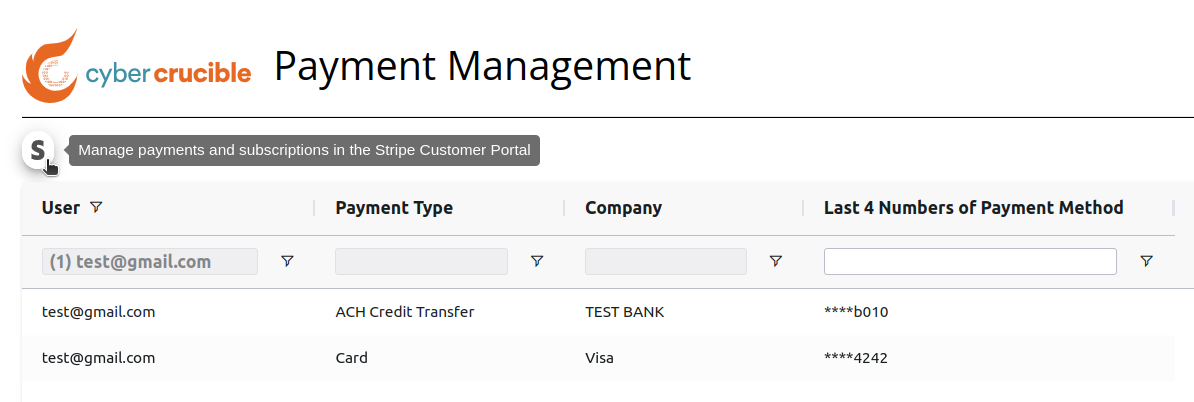In order to manage your subscriptions and payment methods, click the Stripe icon above the grid. Clicking this icon will redirect you to the Stripe Customer Portal in a new tab with your current user prefilled on the login form. Clicking Send will send a link to the email address entered, which will log you into the Stripe Customer Portal where you will be able to manage your account.
You will need to have an existing Stripe customer account (created through Cyber Crucible) to be able to access the Customer Portal, which happens when purchasing licenses. Note that for Deals, the Stripe customer account is associated with the Deal Owner, and also the Prospect Email for referral deals where Cyber Crucible will bill the customer.
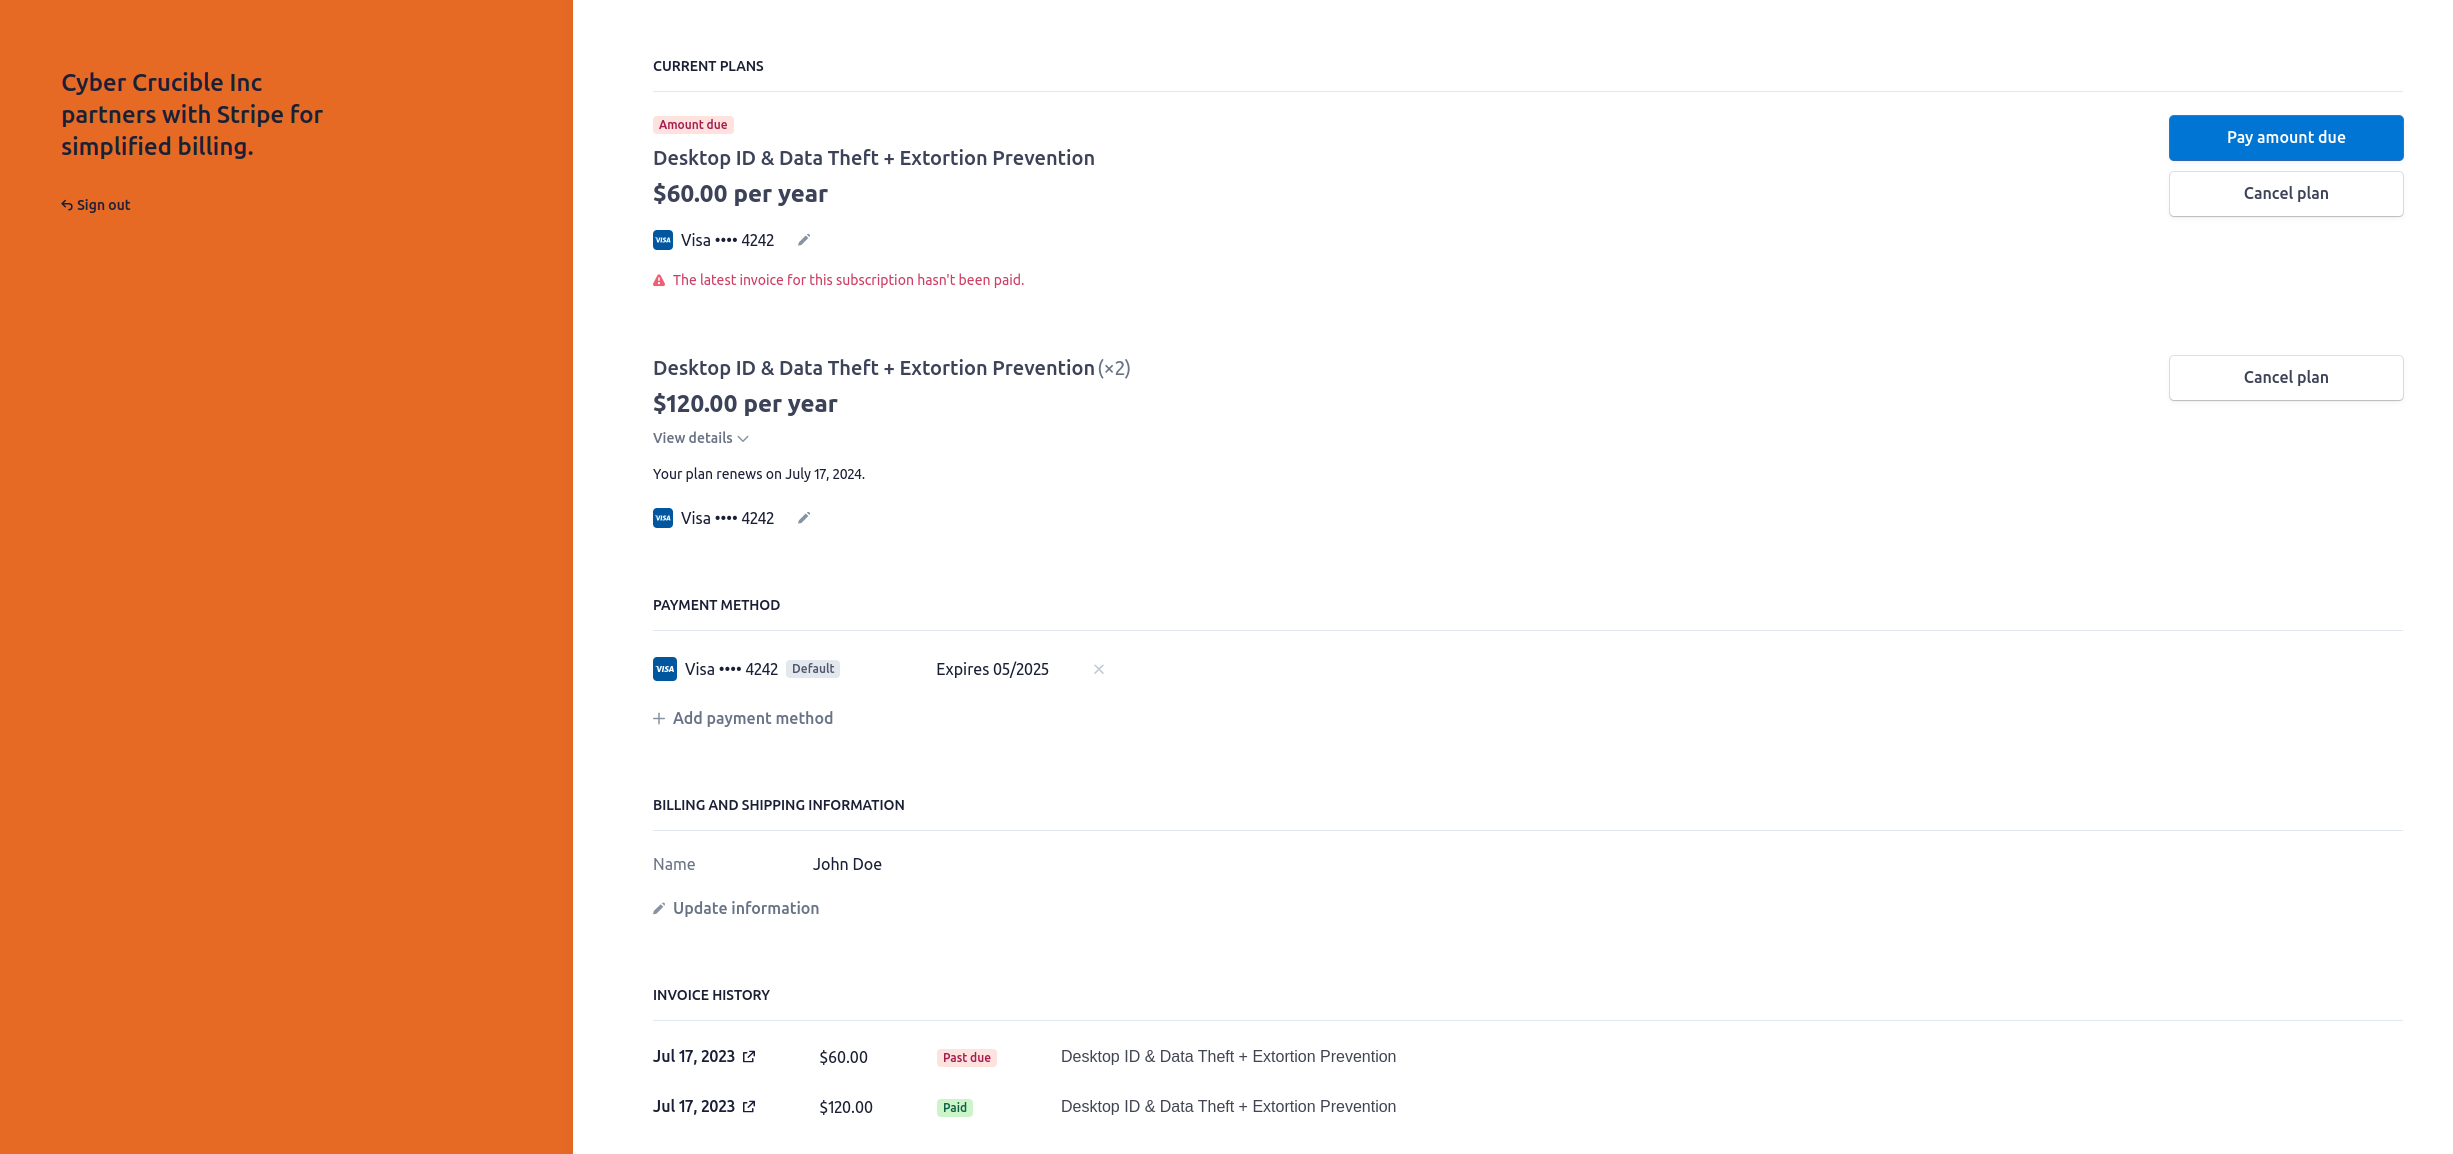
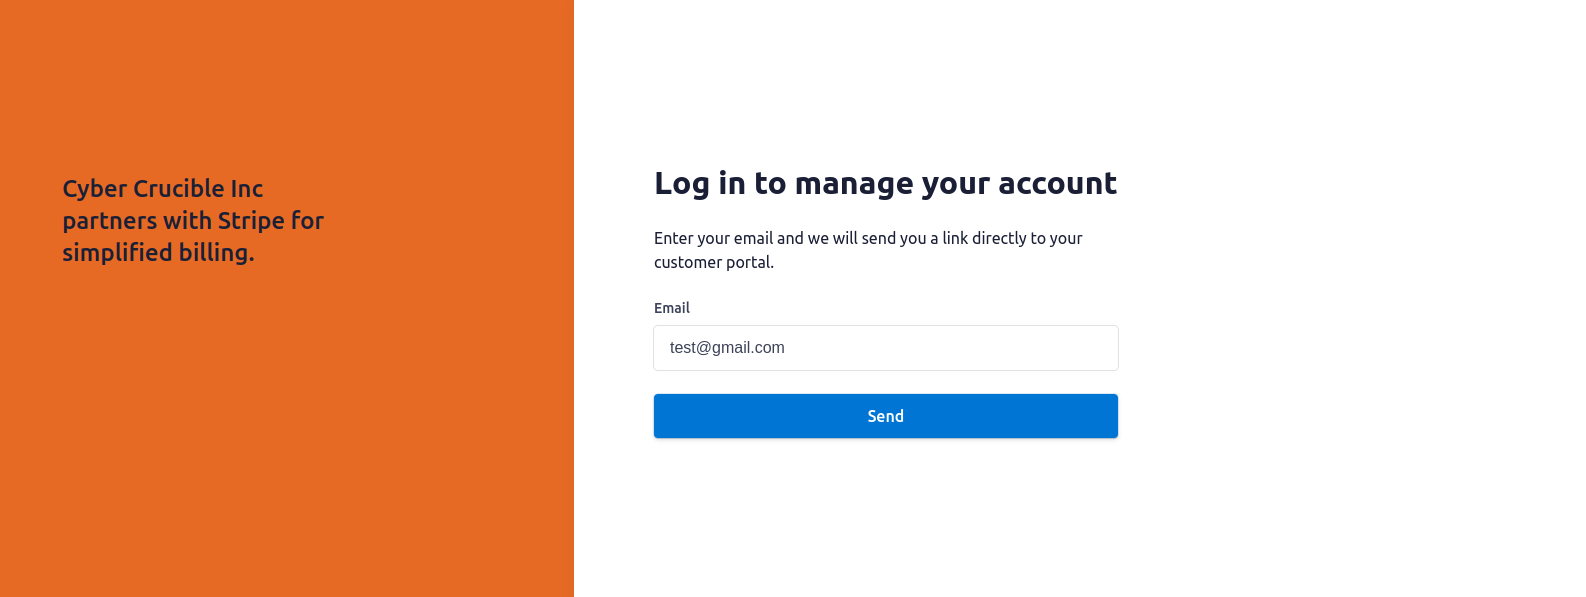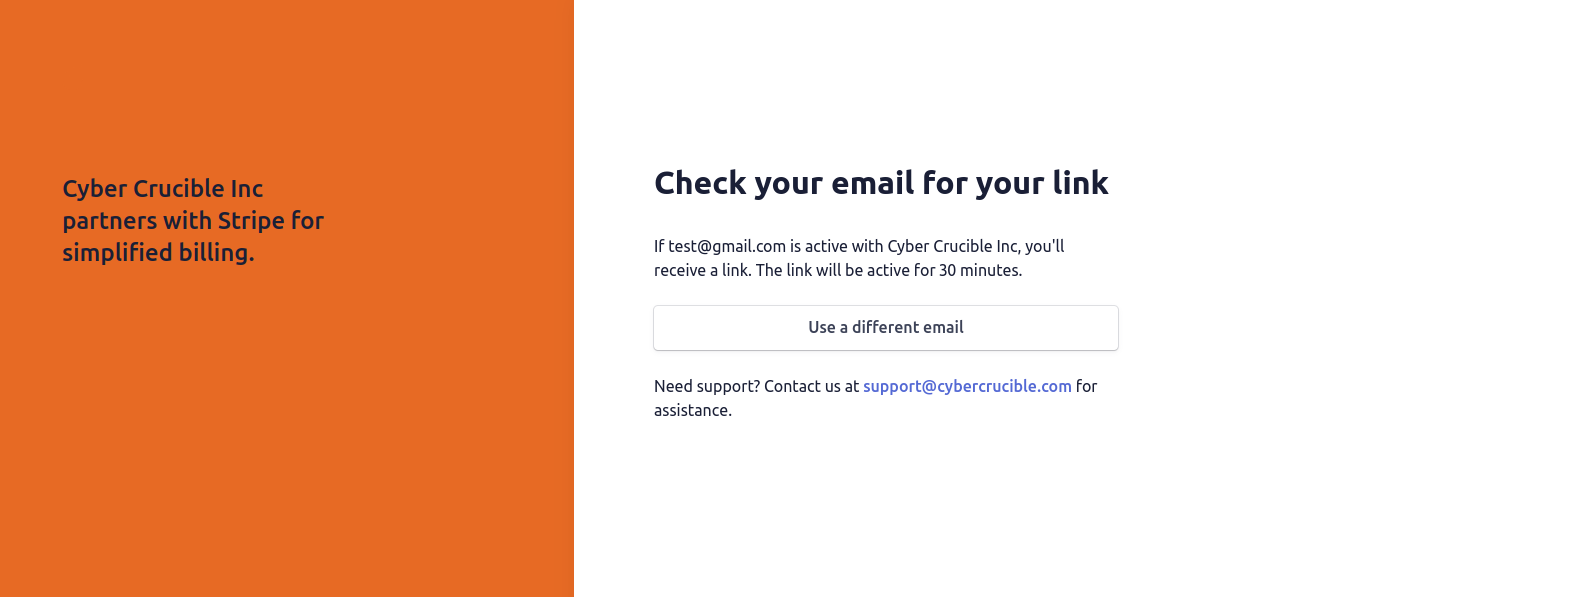After clicking the link sent to your email address, you will be redirected to this page where you are able to:
- View and manage your current subscriptions
- Make payments
- Add payment methods and set the default payment method for your account
- Edit your customer account information
- View the invoice history for your account and pay for open invoices
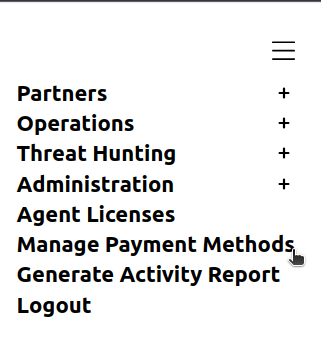
For ease of access, you can also click the Manage Payment Methods tab that will open the Stripe Customer Portal in a new tab.
# Partner Deal Registration
- [How to Register a Deal](#bkmrk-how-to-register-a-de)
- [Deal Length and Billing Cycle Options](#bkmrk-deal-length-and-bill)
- [How to Know when a Deal is Approved](#bkmrk-how-to-know-when-a-d)
- [How to Request a Quote for an Existing Deal](#bkmrk-how-to-request-a-quo)
- [How to Pay for a Deal](#bkmrk-how-to-pay-for-a-dea)
- [How to Download a Signed Quote](#bkmrk-how-to-download-a-si)
- [How to Edit a Deal](#bkmrk-how-to-edit-a-deal)
- [How to Disable a Deal](#bkmrk-how-to-disable-a-dea)
- [How to Enable a Deal](#bkmrk-how-to-enable-a-deal)
# How to Register a Deal
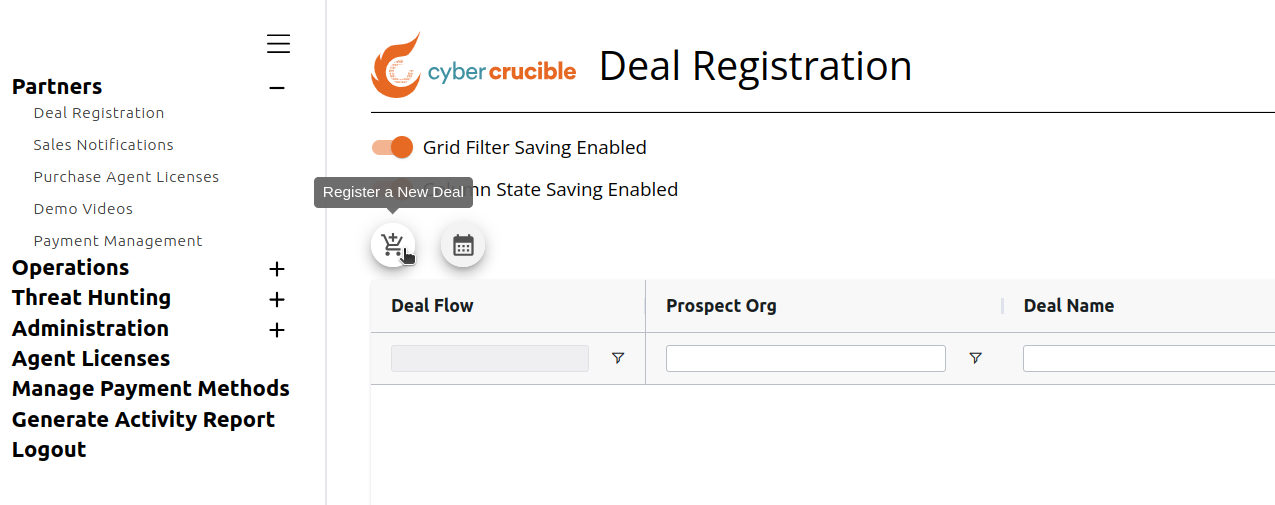
Partners can register a deal prospect by visiting our [Dashboard](https://dashboard.cybercrucible.com/login) and clicking the Deal Registration tab in the Partner Portal. To register a new deal, click the shopping cart icon above the grid. Clicking this icon will open a modal that contains a form to fill out about the new deal. Note that the calendar icon to the right of the shopping cart icon can be used to schedule a product demonstration.
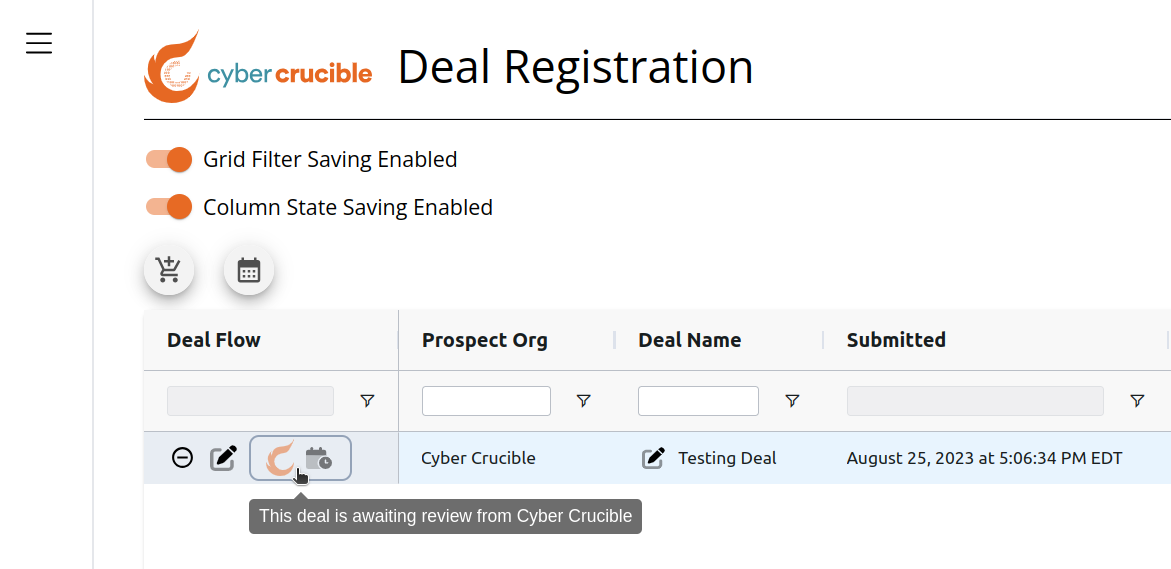
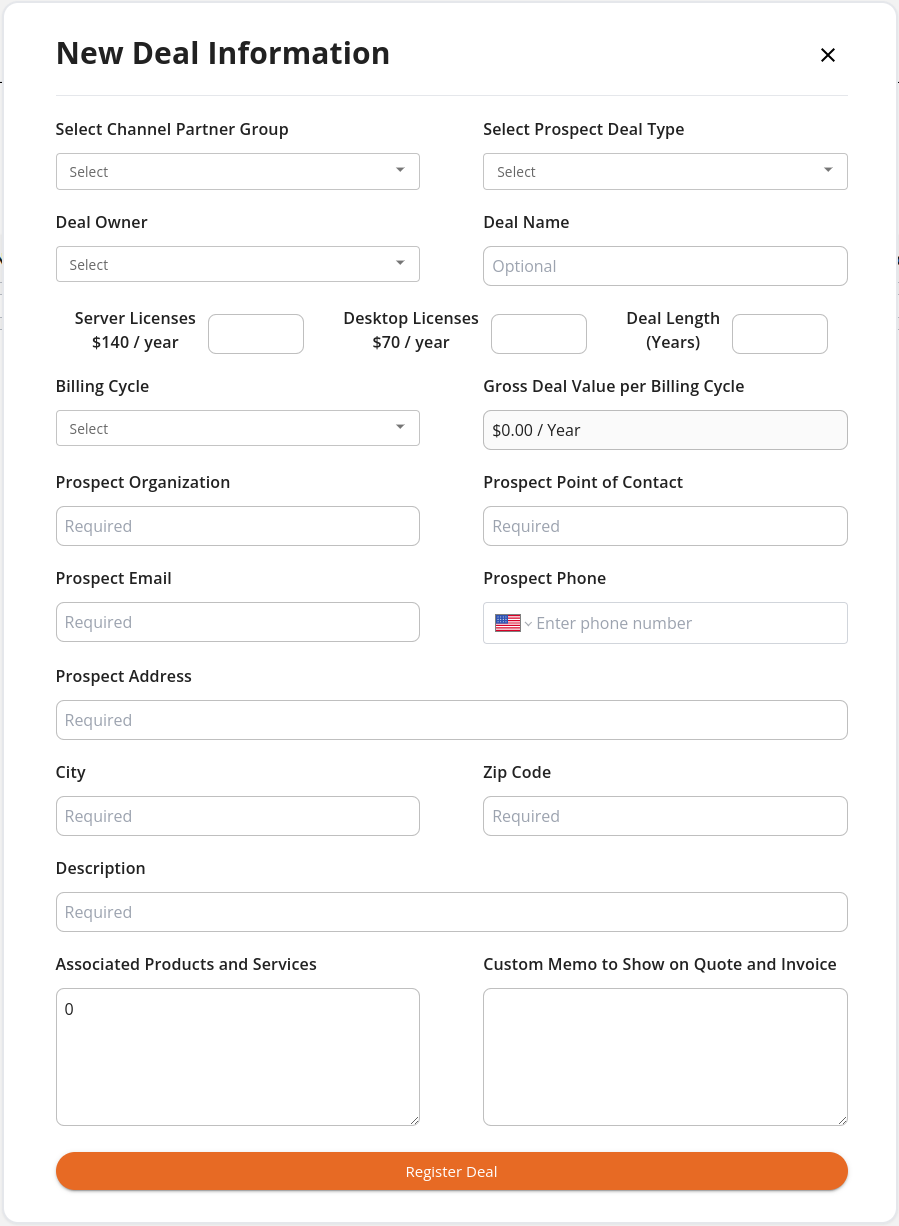Users will need to wait for their newly registered deal to be approved by Cyber Crucible before sending a quote or making a payment. The disable deal icon is still available to users while the deal is awaiting approval.
# Deal Length and Billing Cycle Options
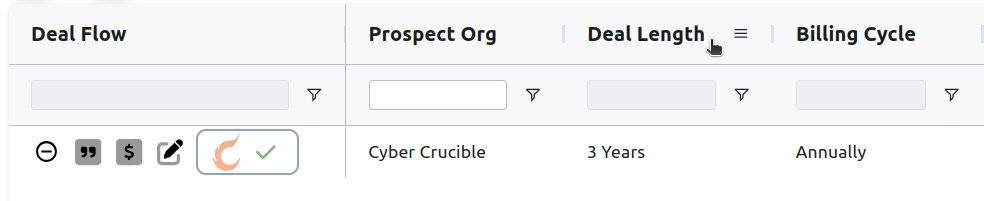
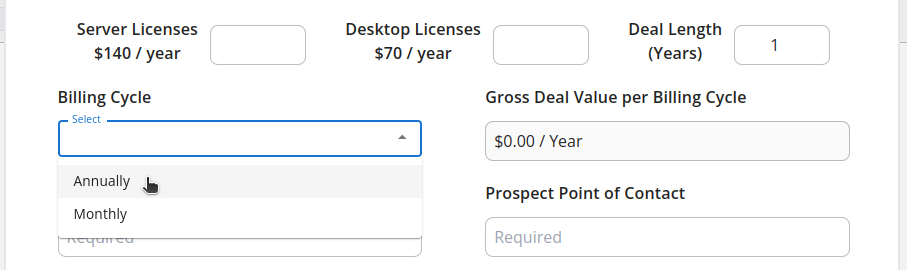
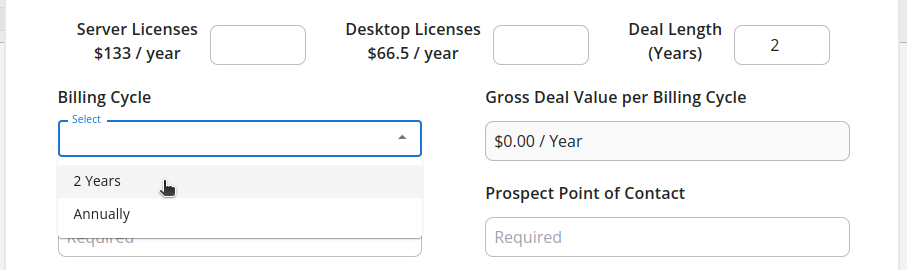
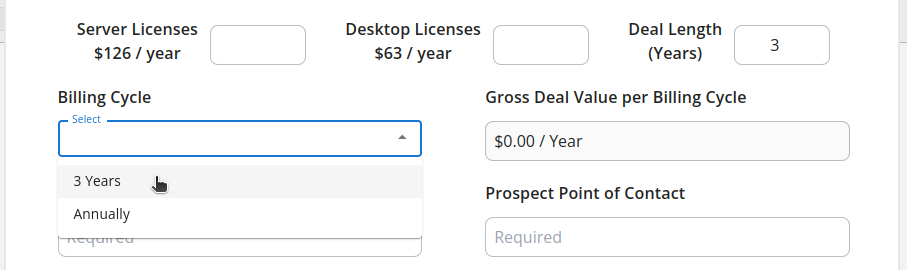
Users can register deals for 1-3 years with varying billing cycle options. See the Deal Length option on the new deal modal and in the Deal Length column on the grid.
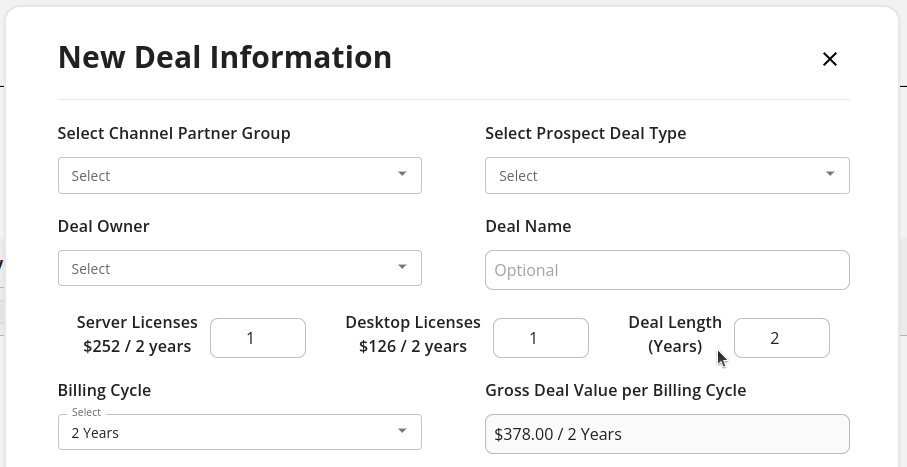For 1 year deals, the billing cycle options are to pay annually or pay monthly.
For 2 and 3 year deals, users can pay up front or pay annually.
# How to Know when a Deal is Approved
Users will know when a deal has been approved by Cyber Crucible when they see a green check mark in the Deal Flow column for the specific deal. When a deal is approved, users will be able to request and sign a quote for the deal.
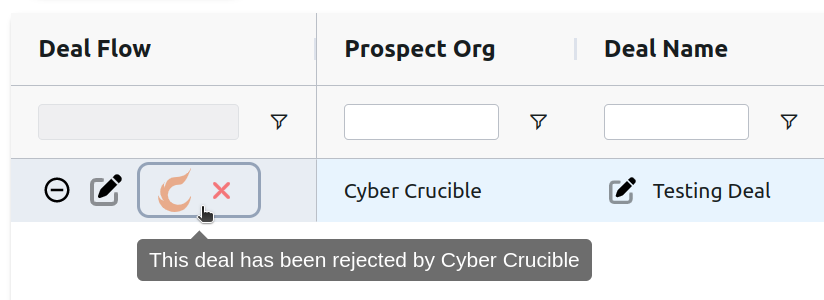
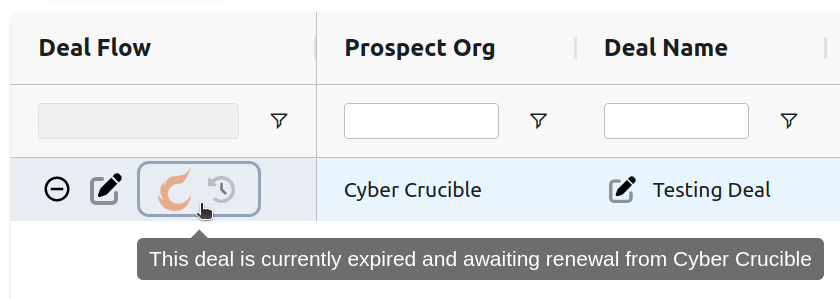
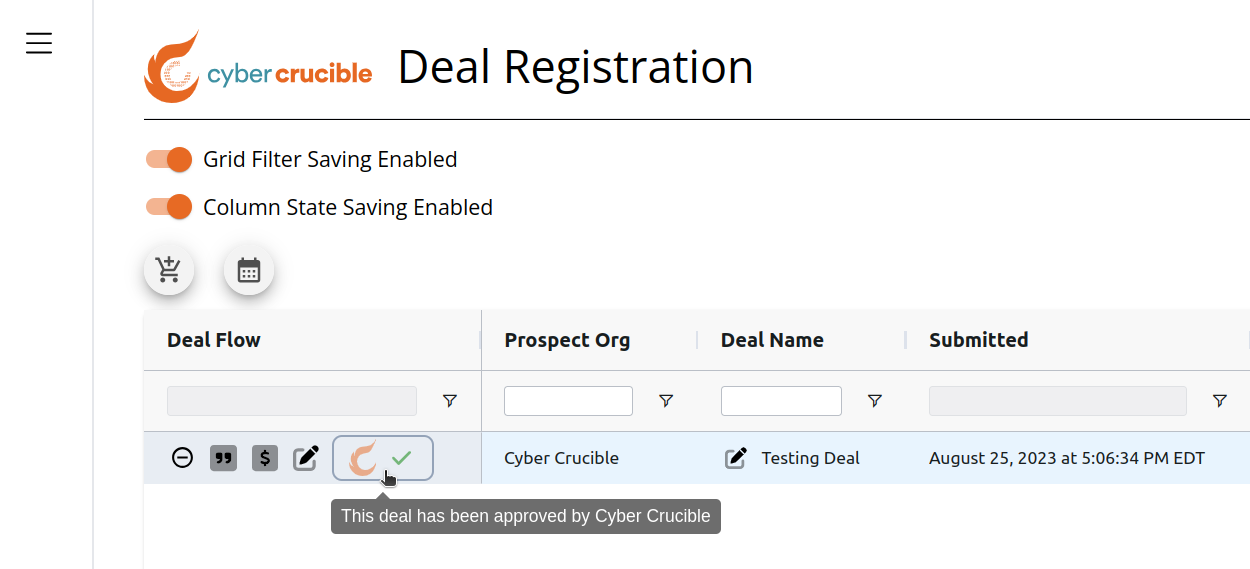Deals may also be rejected or awaiting renewal from Cyber Crucible.
# How to Request a Quote for an Existing Deal
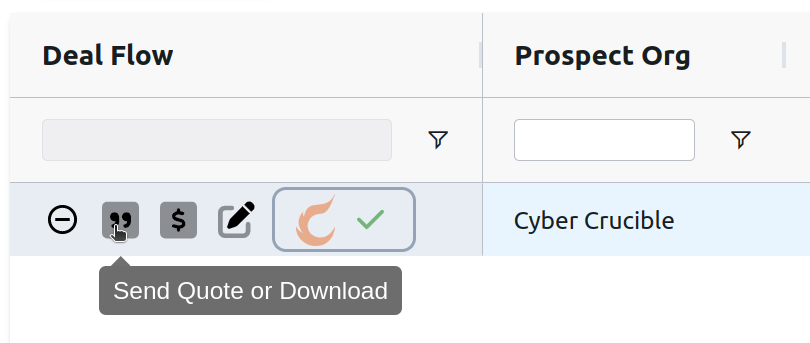
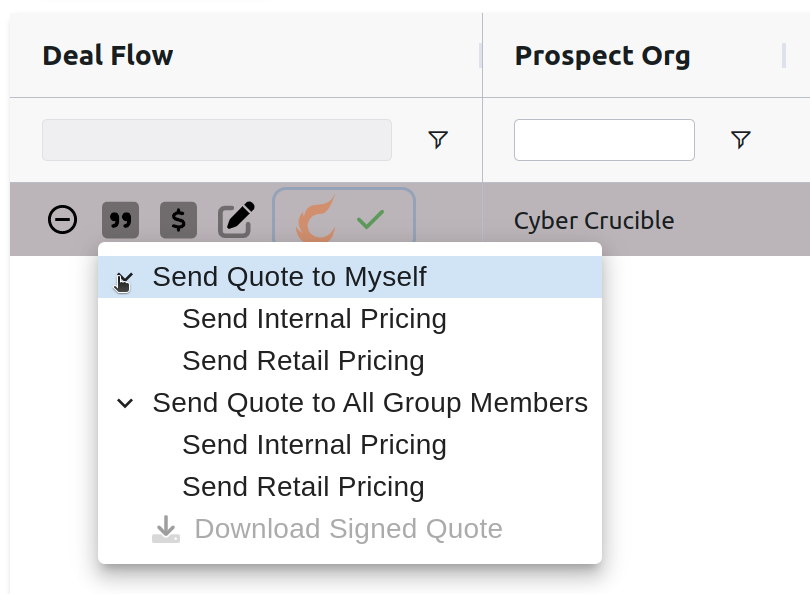
Users can click the quote icon in the Deal Flow column to request a quote for a deal. Clicking this icon will show options for requesting a quote. You can opt to send the quote only to your user email address or send the quote to all members of the specific deal’s group. You can also opt to show the internal pricing in the quote that will show the discount applied for the deal, or retail pricing that will not show the discount applied for the deal and will show full market price.
Please note that users can only request a quote for Cyber Crucible approved deals.
# How to Pay for a Deal
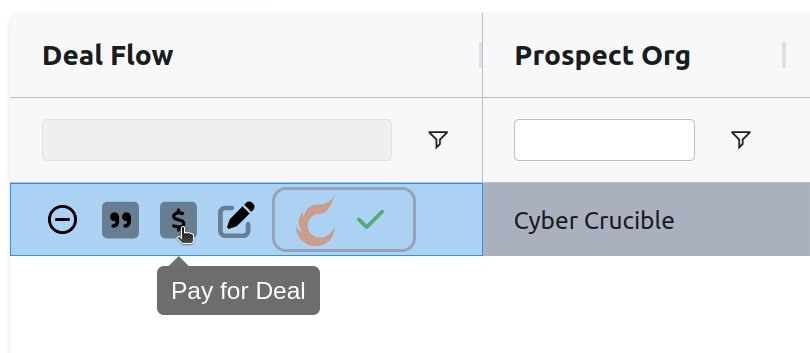
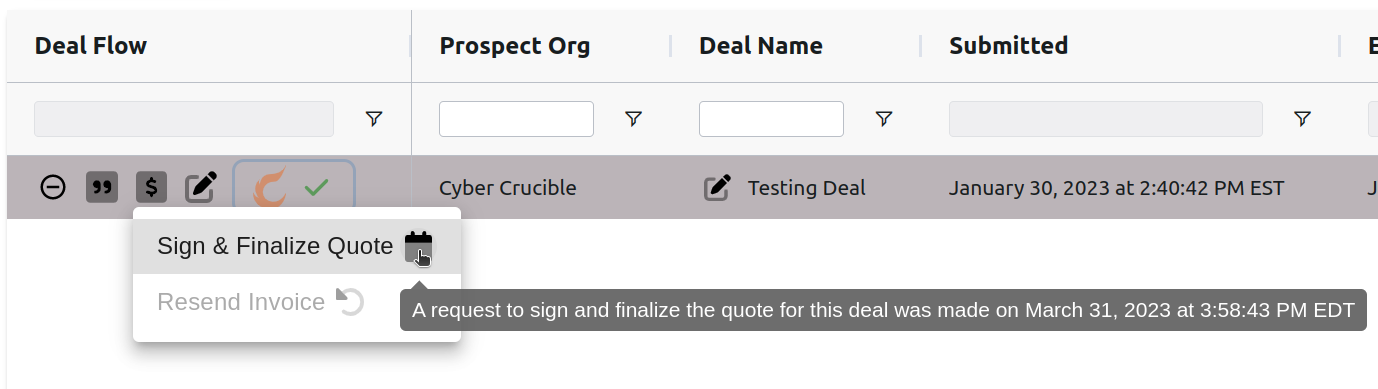
To pay for a deal, users can click the dollar sign icon in the Deal Flow column which will then show the Sign & Finalize Quote option. Clicking this option will alert our sales team of the request, and a salesperson will be in contact for the next steps. Hovering over the calendar icon also shows the date the most recent request was made.
Signing the quote will complete the deal, and the licenses for the deal will be populated shortly after with a net 30 invoice for payment.
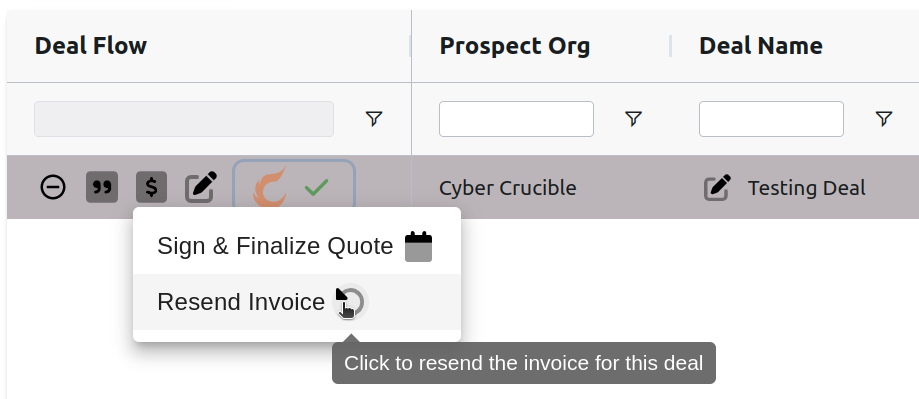
Note that you can also resend the invoice in this menu:
# How to Download a Signed Quote
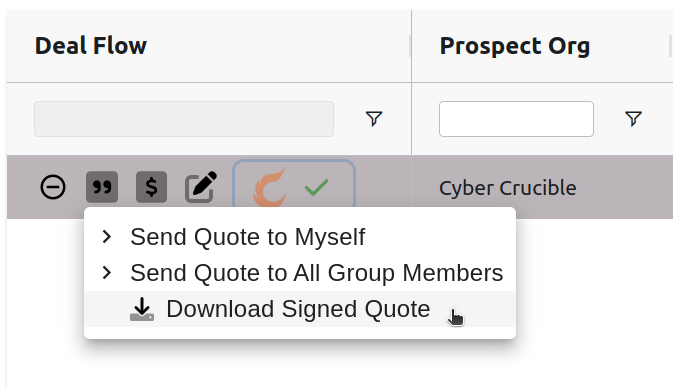
After signing a quote to complete the deal, users will be able to download the signed quote by clicking the quote icon in the Deal Flow column and clicking the Download Signed Quote option.
# How to Edit a Deal
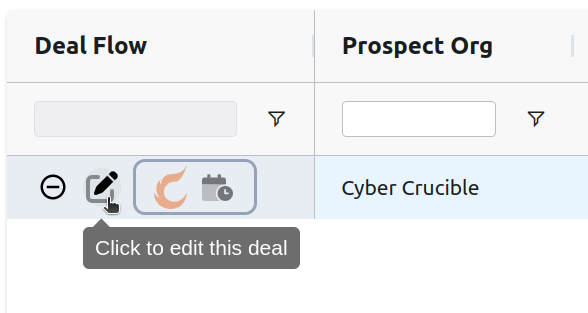
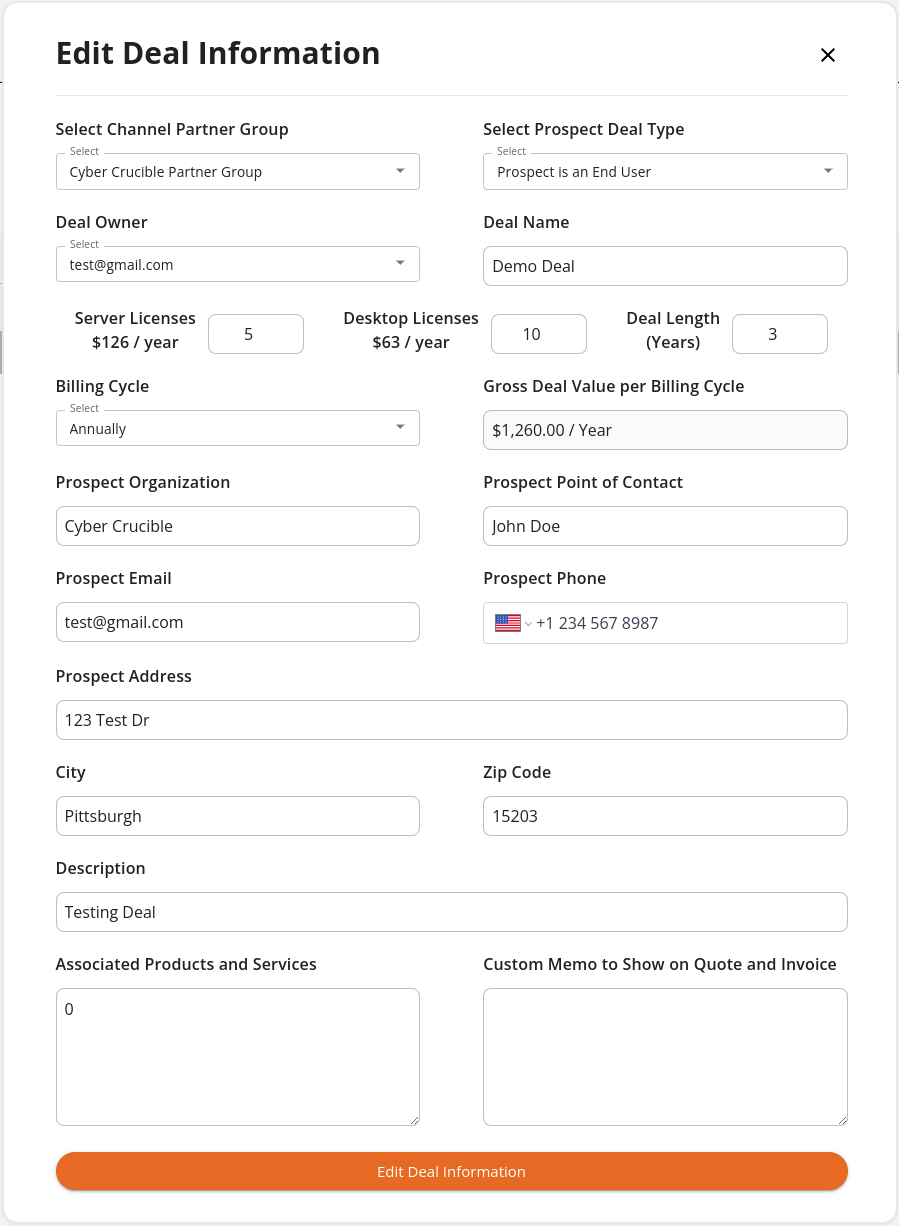
Users can edit a deal by clicking the edit icon in the Deal Flow column. Clicking this icon will open up a modal where users can edit the information of the deal. This modal is the same as the new deal modal, except the information is pre-filled with the deal’s current information.
If the deal has not been completed and a request to sign and finalize the quote for the deal has not been made, then users are able to edit all of the deal’s attributes on the modal.
Note that changes involving the deal type, license counts, billing cycle, channel partner group, and prospect organization will need to be approved Cyber Crucible. This means that deals will be reset to the pending Cyber Crucible approval state when these fields are changed.
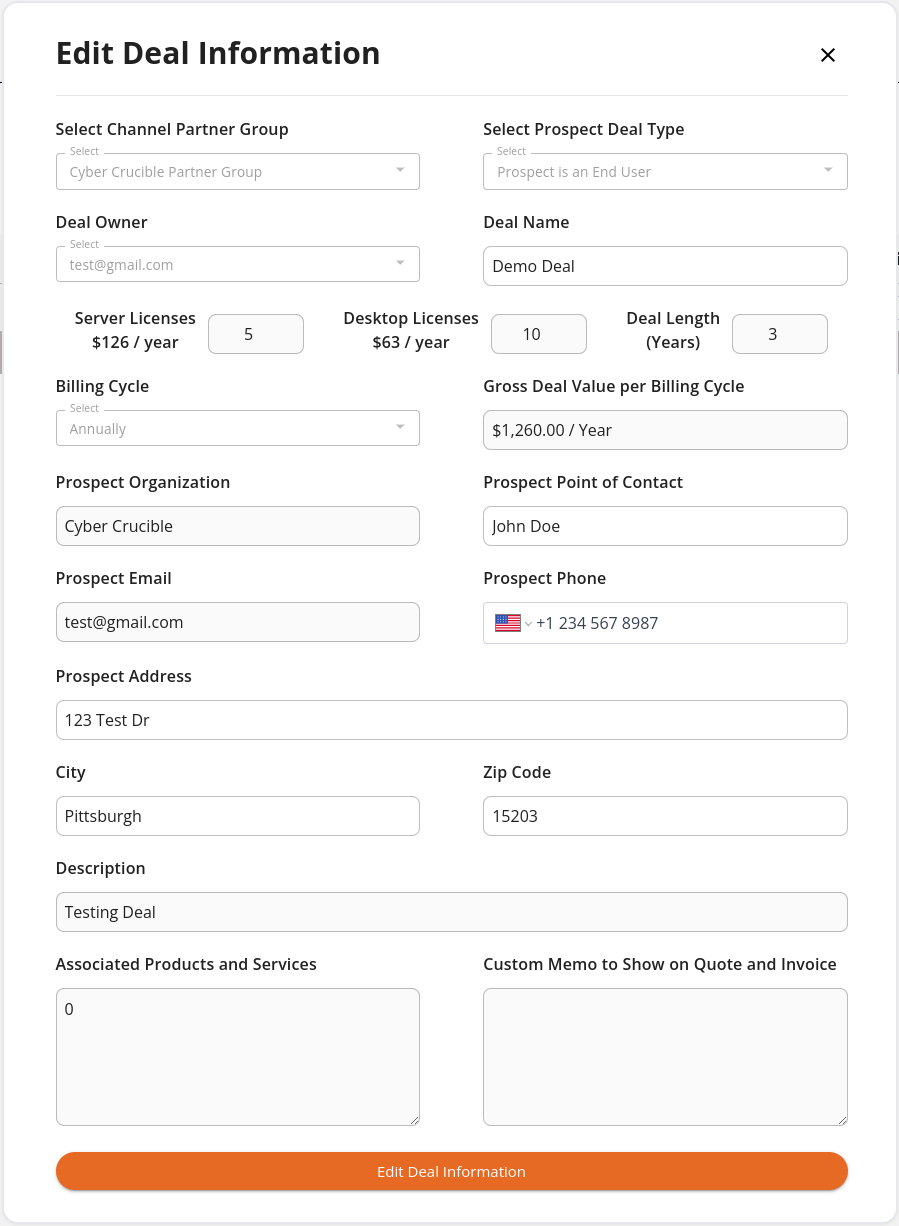
If the deal has been completed or the request to sign and finalize the quote for the deal has been made, certain attributes of the deal are not able to be changed and will be disabled on the modal.
# How to Disable a Deal
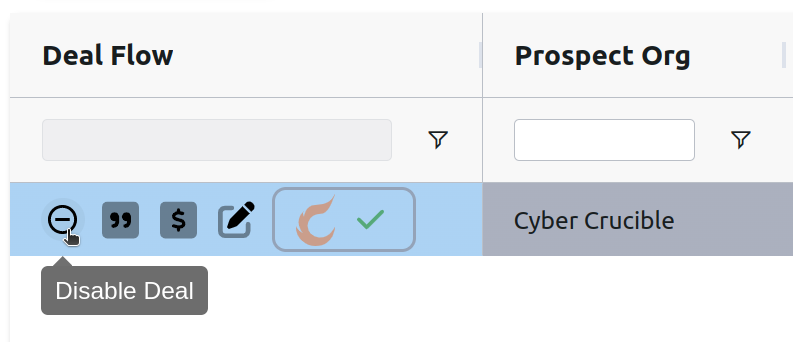
Users can disable a deal by clicking the minus sign icon in the Deal Flow column. Disabling a deal means that quotes for this deal cannot be sent, and users will not be able to use the Sign & Finalize Quote option for payment.
# How to Enable a Deal
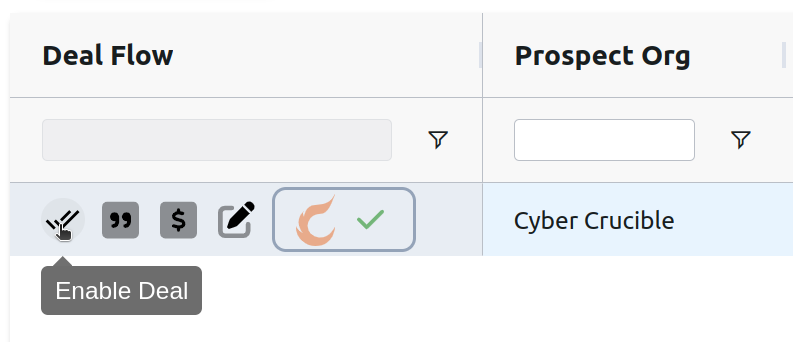
Users can enable a disabled deal by clicking the double check mark icon in the Deal Flow column.
# Sales Email Notifications
- [Introduction](#bkmrk-introduction)
- [How to Create a Sales Notification](#bkmrk-how-to-create-a-sale)
- [How to Delete a Sales Notification](#bkmrk-how-to-delete-a-sale)
- [How to Turn a Sales Notification Off Without Deleting](#bkmrk-how-to-turn-a-sales-)
# Introduction
Sales Notifications are alerts emailed out to users relating to sales activities, and they are available to Partners only. Most sales notifications are one time alerts sent out, but there is a repeating deal expired alert as a possible notification type (see notification types below). As with our security notifications, users may opt to send the sales notification alert to a single email address, or send the alert to all group members.
# How to Create a Sales Notification
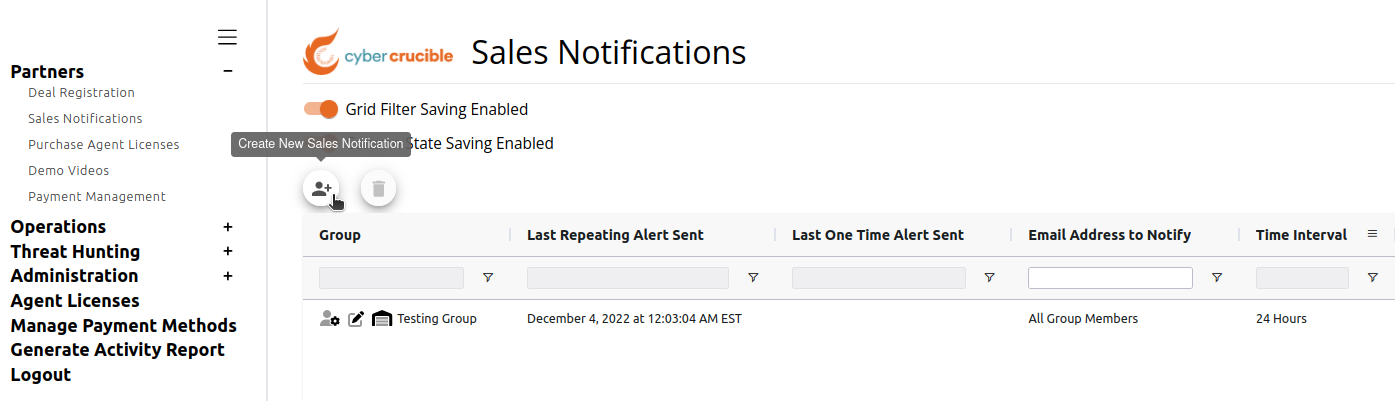
Users can create sales notifications by first logging into our website and going to the Sales Notifications page found under the Partner Portal tab on the left sidebar. You must have access to the Partner Portal to be able to access this page.
Then click on the Create New Sales Notification icon above the grid, which will open a modal with information to fill out about the new notification.
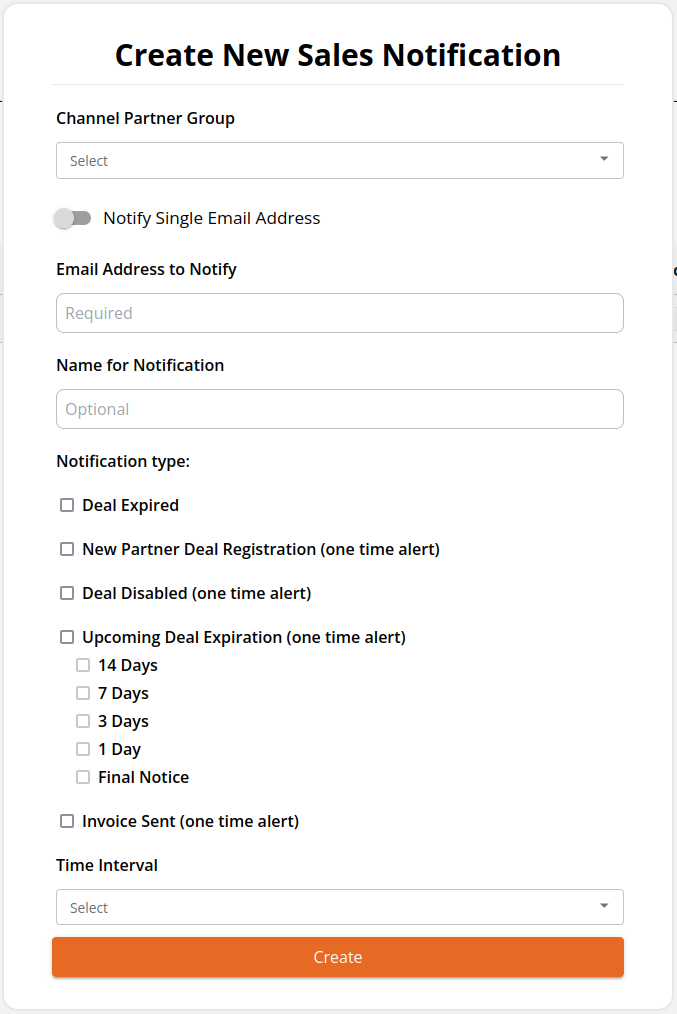On this modal you may choose to:
- Select the partner group the notification is for
- Send notification emails to all group members, or limit to a single email address
- Enter a friendly name for the notification (optional), otherwise the notification will be given a randomly assigned name
- Select Notification Types that this notification will send alerts for
- The one time alert notification types are indicated with having “(one time alert)” after the type
- Otherwise the notification type is for a repeating alert
- Select the time interval for how often any repeating alert will be sent out
# How to Delete a Sales Notification
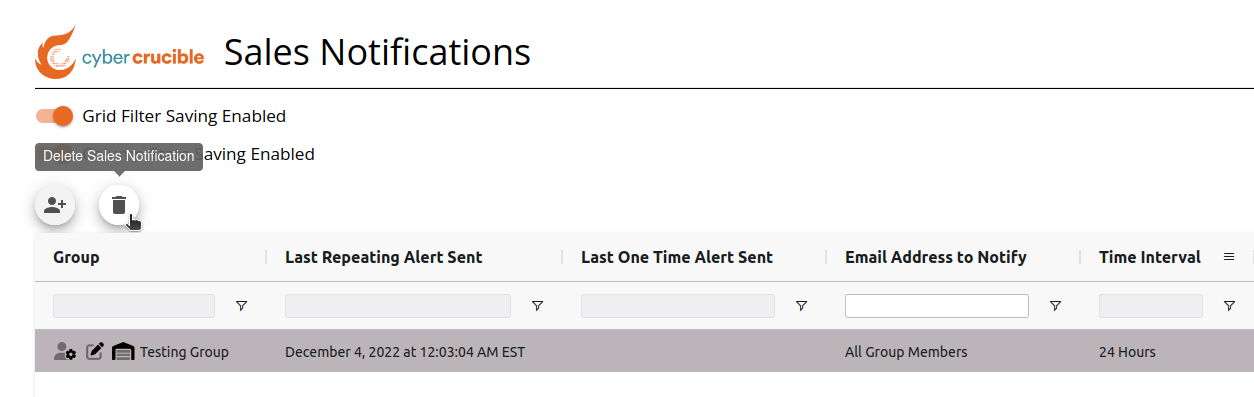
Users can delete a sales notification by first selecting the desired notification to delete on the grid, and then clicking the trash icon above the grid.
Note that partner groups must have at least one sales notification, so a message will be displayed if you try to delete a group’s last sales notification. See the next section for how to turn off sales notifications without deleting them
# How to Turn a Sales Notification Off Without Deleting
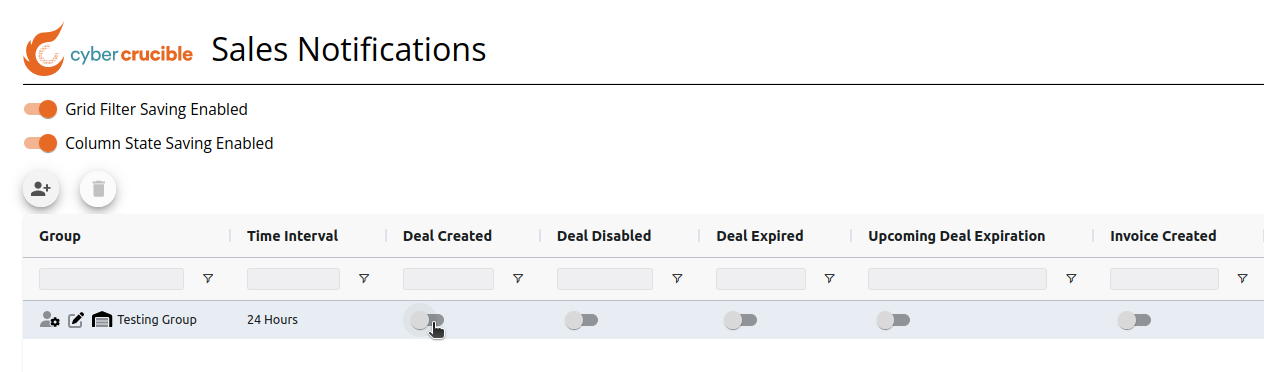
If you wish to turn a sales notification off without deleting it, you need to find the desired notification on the grid and then turn the toggles off for each of the columns shown below:
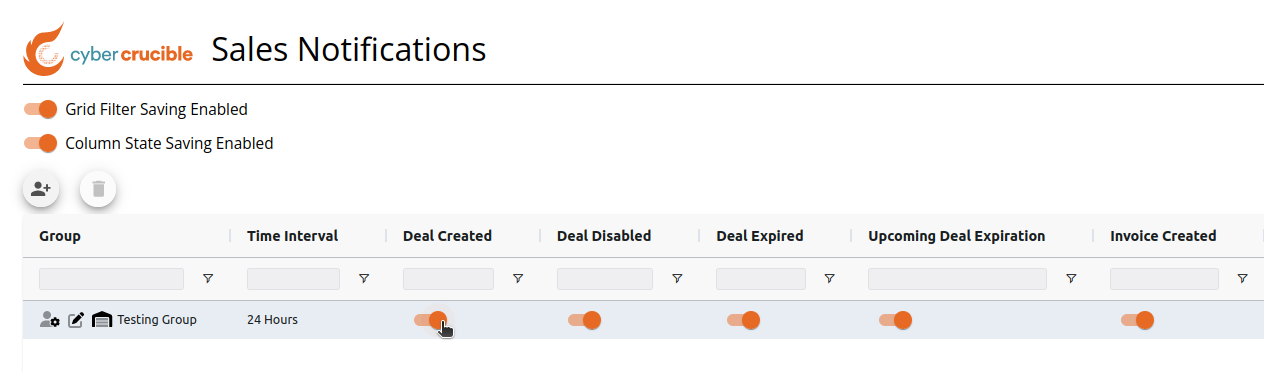The sales notification will be turned off when the toggles for each of the shown columns look like: