- [Where to Find a Group’s Current Proxy Configuration Setting](#bkmrk-where-to-find-a-grou)
- [How to Update a Group to Enable a Proxy Server](#bkmrk-how-to-update-a-grou)
- [How to Update a Group to Not Use a Proxy](#bkmrk-how-to-update-a-grou-1)
- [How to Remove a Saved Proxy Configuration in a Group](#bkmrk-how-to-remove-a-save)
- [How to Install an Agent Using a Proxy](#bkmrk-how-to-install-an-ag)
- [Where Can I See if an Agent is Able to Bypass the Proxy?](#bkmrk-where-can-i-see-if-a)
Note that only agents on version 4.4.6.3 and higher have this capability
# Where to Find a Group’s Current Proxy Configuration Setting
Users can view a group’s current proxy server configuration setting for agents in this group to follow by first navigating to the Groups page found under the Administration tab in the sidebar.
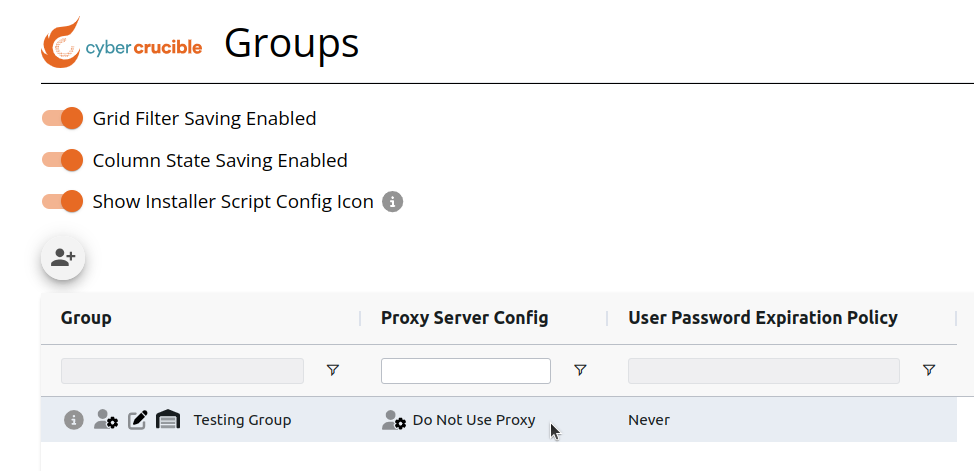
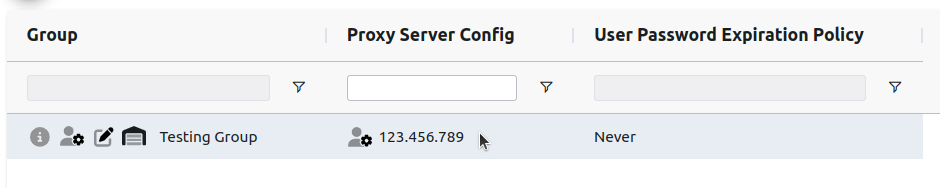
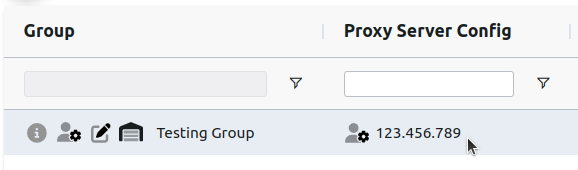
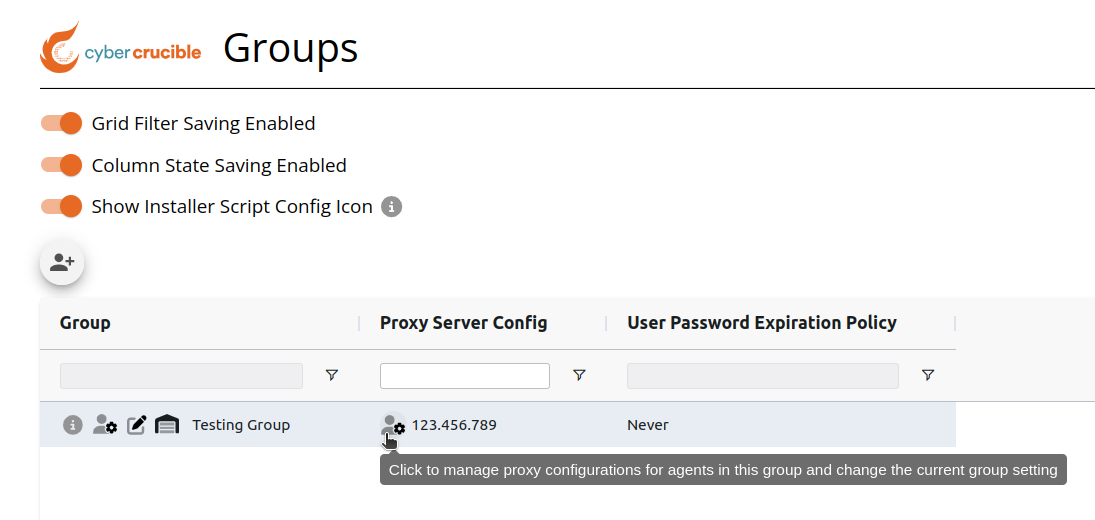
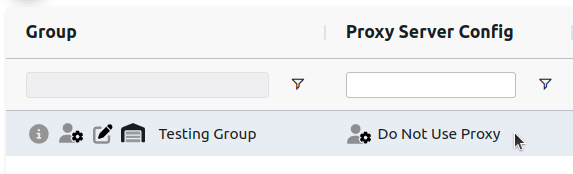
A group’s current proxy server config setting can be found in the “Proxy Server Config“ column on the grid.
If the group does not have a proxy server config enabled, the “Do Not Use Proxy“ text will be shown.
If the group has a proxy server config enabled, the current proxy config’s URL will be shown
# How to Update a Group to Enable a Proxy Server
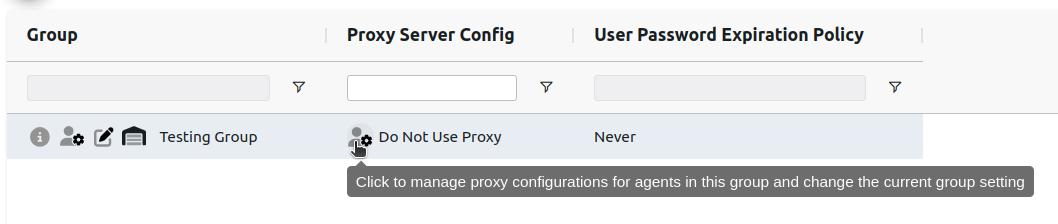
Users can enable agents in a group to use a proxy server by first clicking the manage proxy configurations icon in the “Proxy Server Config” column on the Groups page. Clicking this icon will popup a modal where users can manage the proxy server configurations for the group.
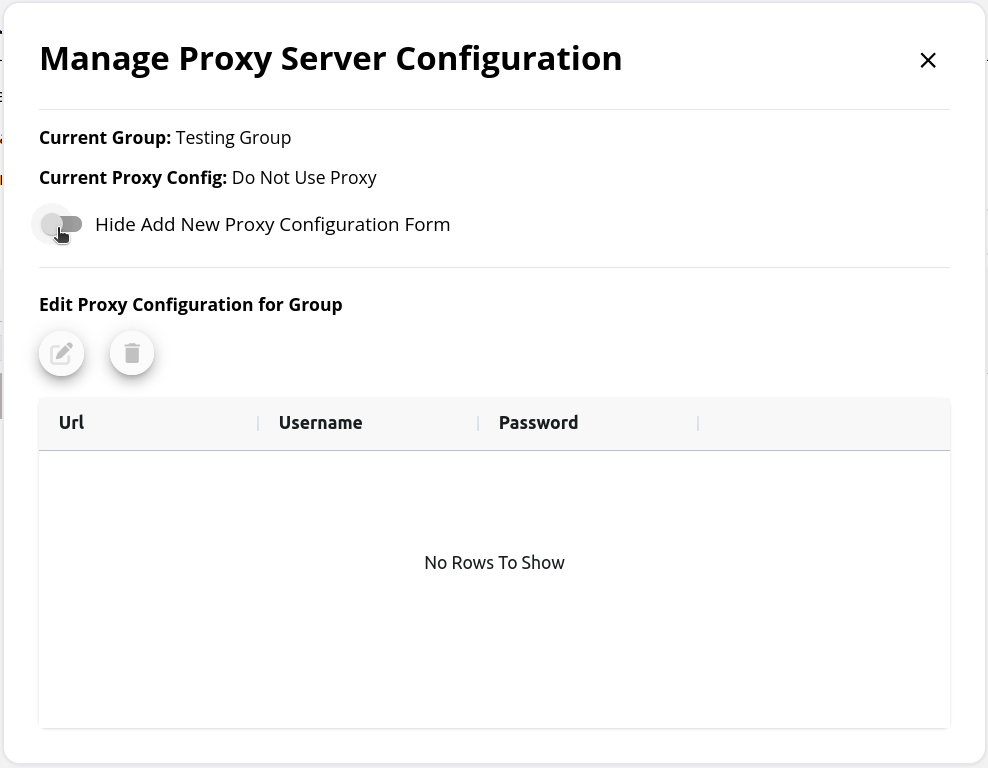
The Manage Proxy Server Configuration modal that appears is used to view and manage the proxy server configurations for the group. Users can save multiple configurations inside a group, and all saved configs are shown on this modal’s grid. Note that all saved proxy server configurations for a group will appear on the Download Agent modal as well.
In order to select a proxy server configuration for the group, the config must first be submitted on the New Proxy Configuration Form. This form is hidden by default, click the toggle to display it.
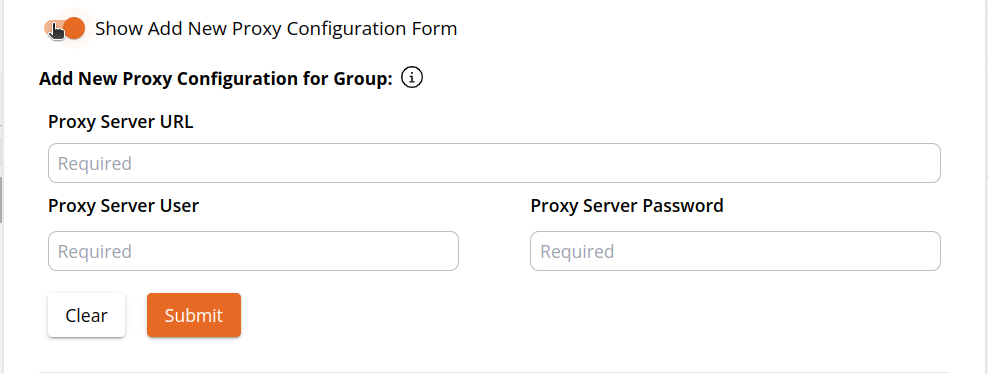After submitting the new configuration form, it will be shown below on the modal’s grid.
To select a proxy configuration for agents in this group to use, first select the desired configuration, then click the edit icon above the grid.
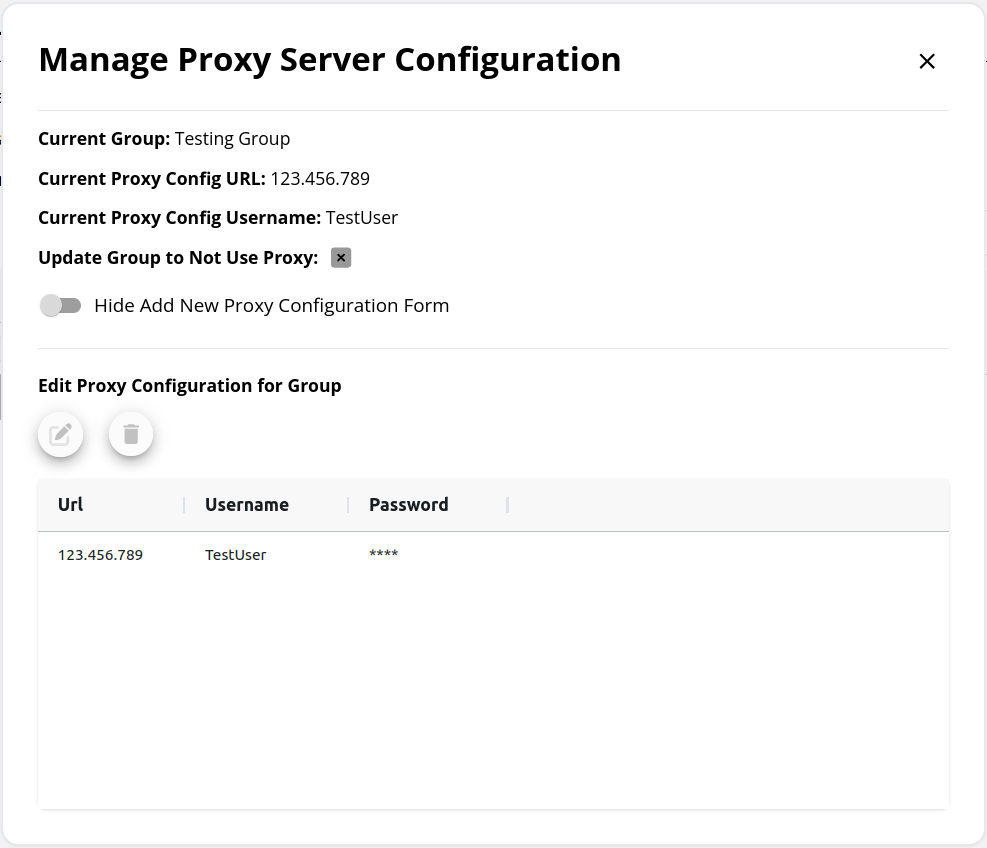
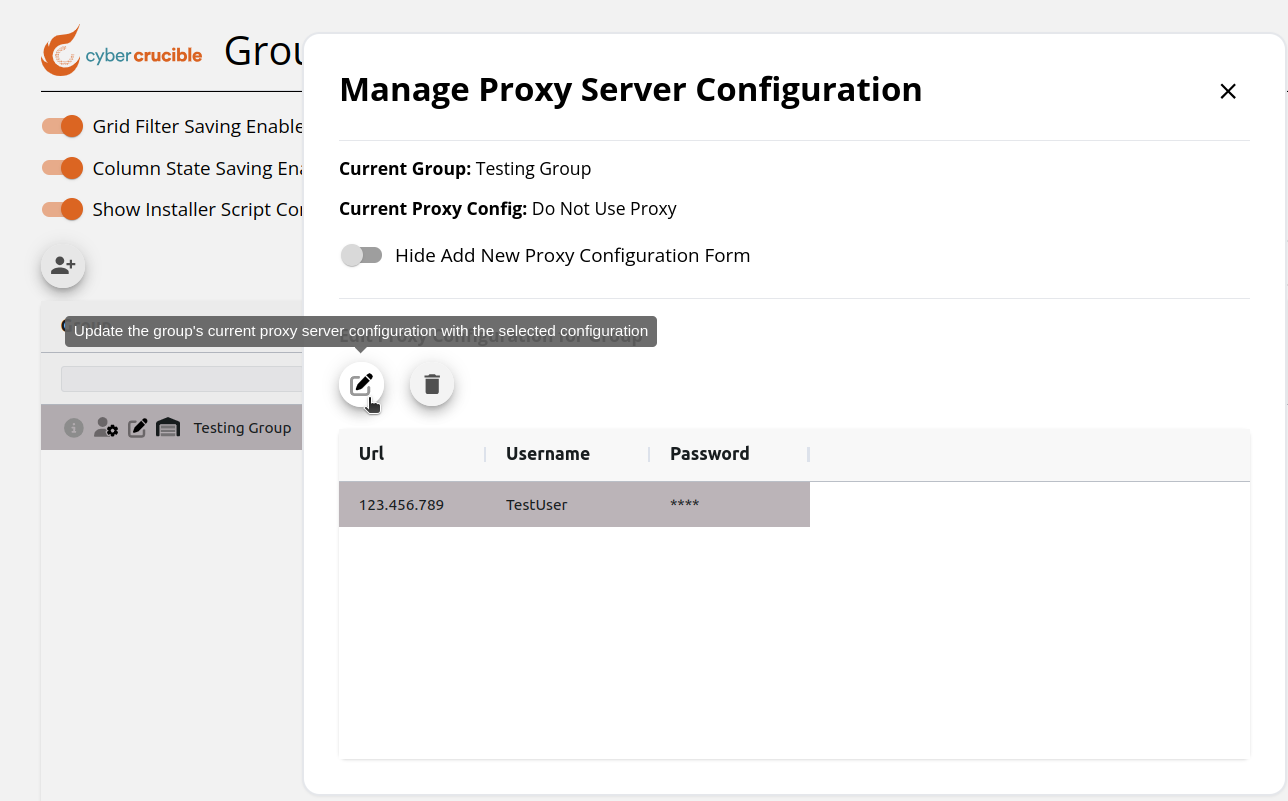After clicking the edit icon for the desired proxy configuration, the group’s current proxy server config is now updated and can be seen on this modal and in the “Proxy Server Config” column. Agents in this group will now use the group’s updated proxy configuration. Note that if an agent receives instructions to switch to an unreachable proxy server it will not switch until that server becomes reachable.
# How to Update a Group to Not Use a Proxy
If a group has a proxy server enabled for agents in this group to use and users want to update the group so that agents in this group will not use a proxy, first navigate to the Groups page and locate the desired group on the grid.
Then click the manage proxy configurations icon in the “Proxy Server Config“ column. Clicking this icon will pop up the Manage Proxy Server Configuration modal.
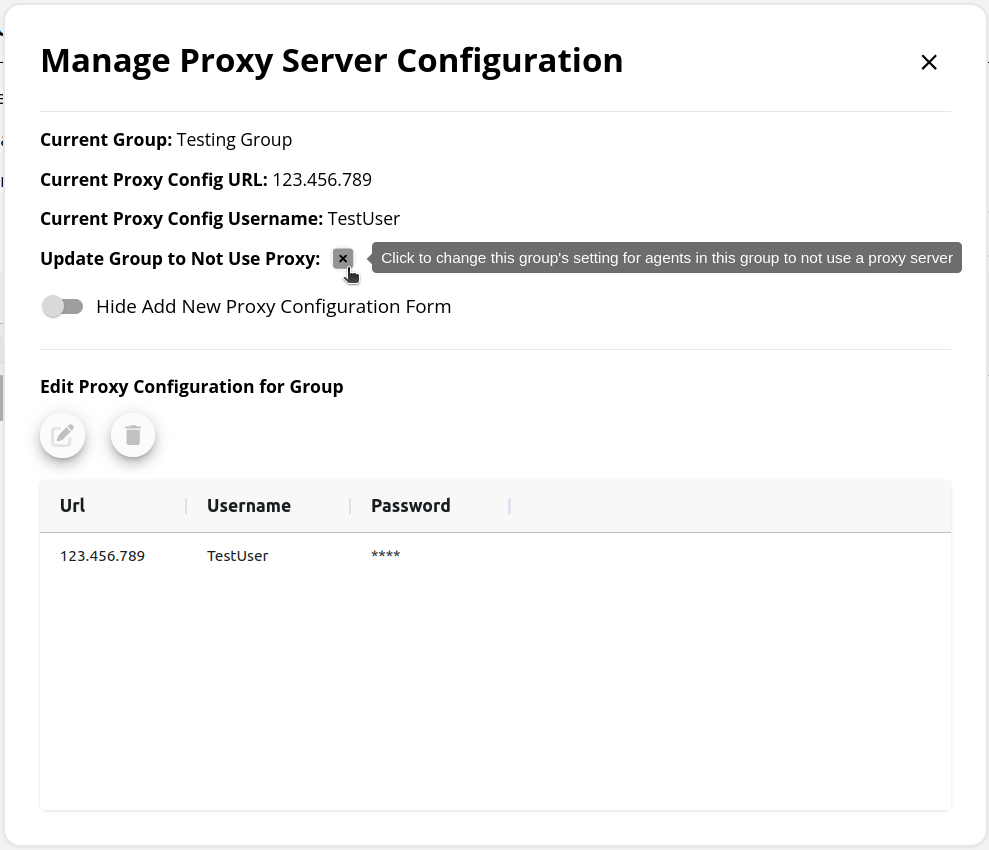
On this modal, click the x icon to update agents in this group to not use a proxy server and call to our servers normally. Note that the current proxy configuration will not be removed from the group’s saved proxy configurations, this is a separate step explained in the section below.
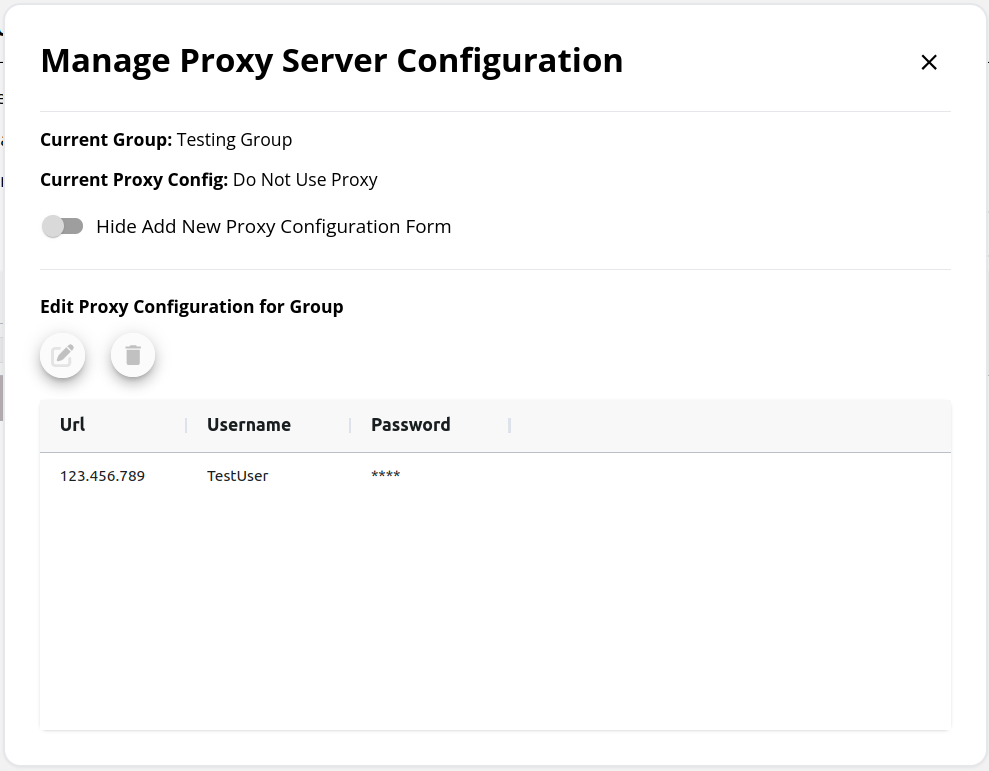
After clicking the x icon, the modal will be updated to reflect this change and the “Proxy Server Config“ column for this group will now show “Do Not Use Proxy“.
# How to Remove a Saved Proxy Configuration in a Group
To remove a group’s saved proxy configuration, first navigate to the Groups page and locate the desired group on the grid.
Then click the manage proxy configurations icon in the “Proxy Server Config“ column. Clicking this icon will pop up the Manage Proxy Server Configuration modal.
On this modal, click the desired saved proxy configuration to remove for this group, then click the trash icon. After clicking this icon, the selected proxy configuration will no longer appear in the grid as a saved proxy configuration for the group.
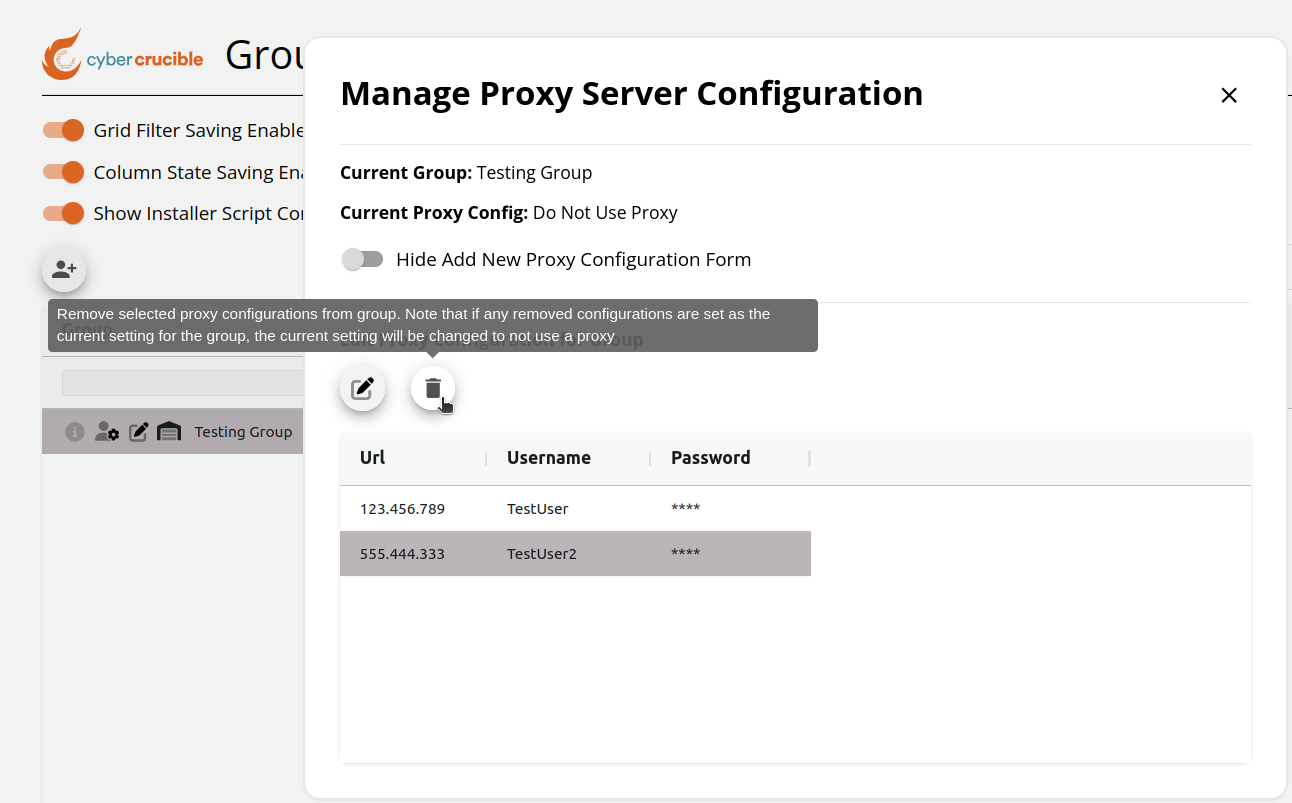Note that if you remove a saved proxy configuration for a group and this configuration is set as the current proxy server configuration for the group, this will also update the group’s current proxy server configuration to not use a proxy.
# How to Install an Agent Using a Proxy
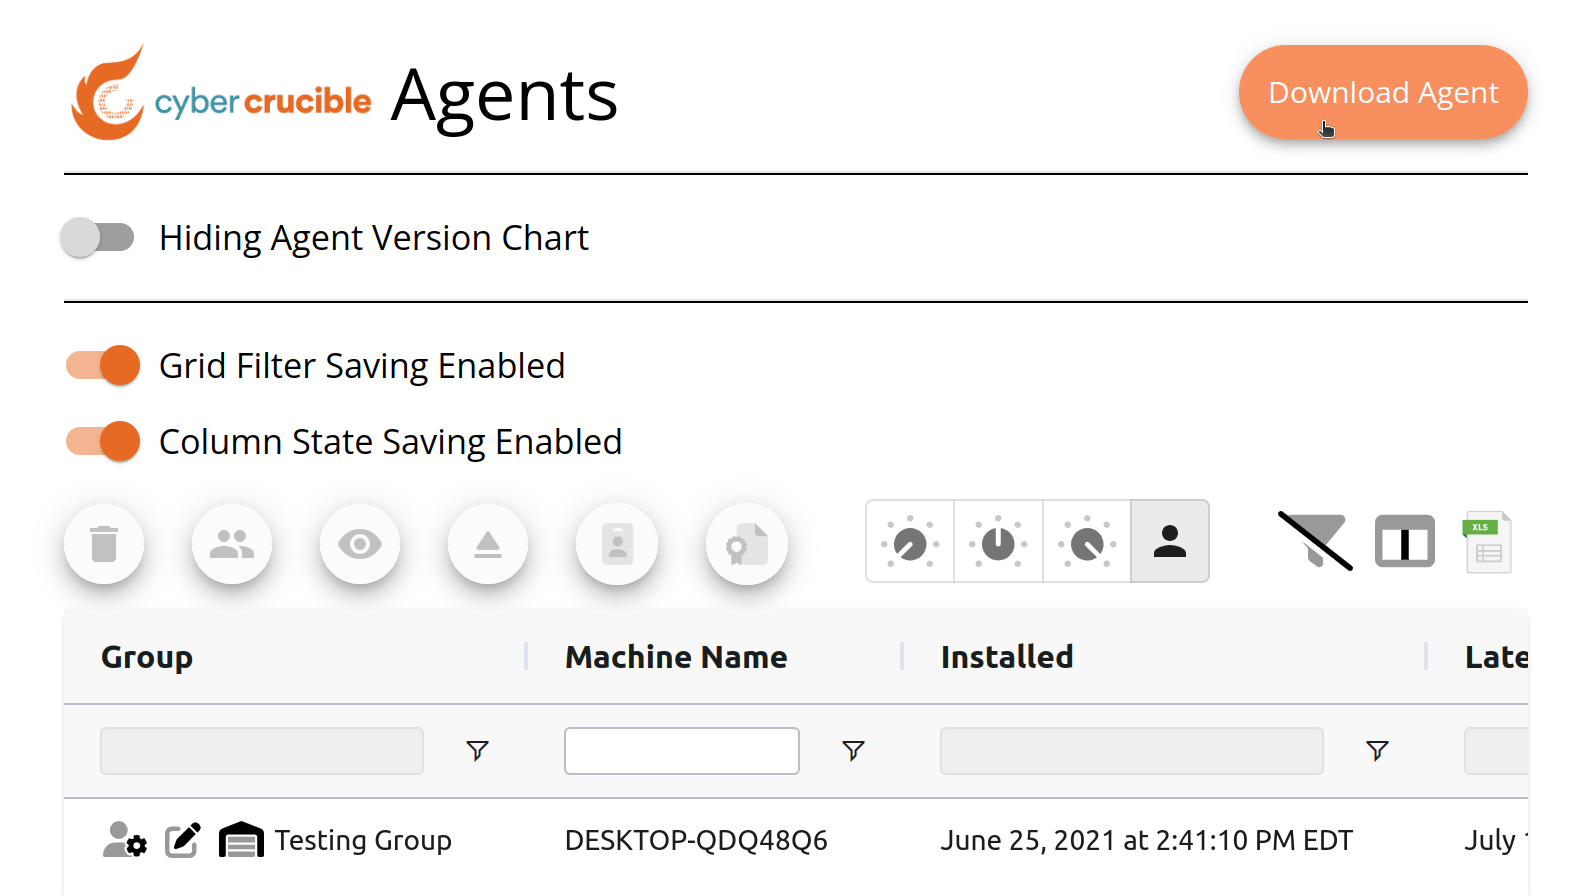
First, navigate to the Agents page found under the Operations tab in the sidebar. Then click the Download Agent button. Clicking this button will popup the Download Agent modal.
On this modal, if you select a group that has saved proxy configurations, the Select Proxy Configuration for Installer option will appear with the group’s current setting selected as the default value. All of the group’s saved proxy configurations will appear as options as well, including a Do Not Use Proxy option.
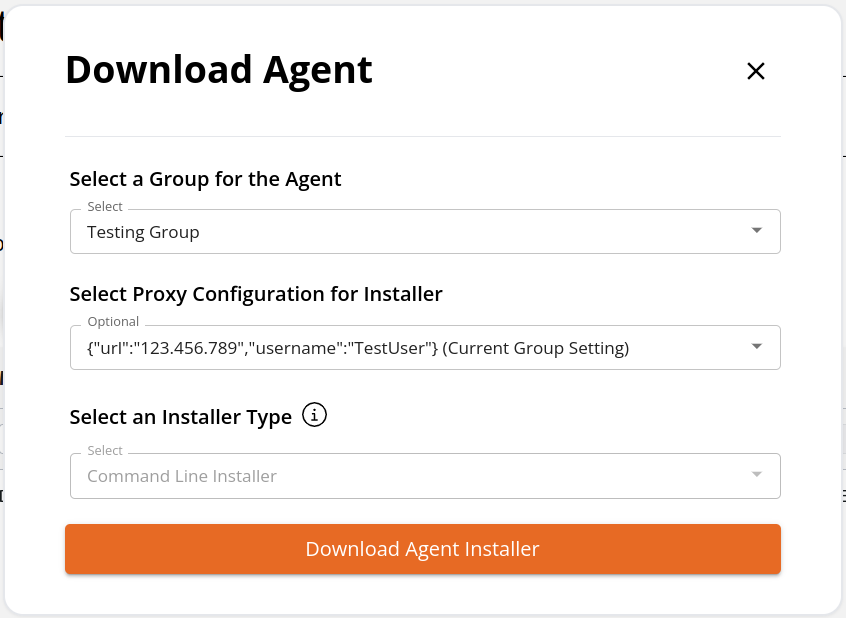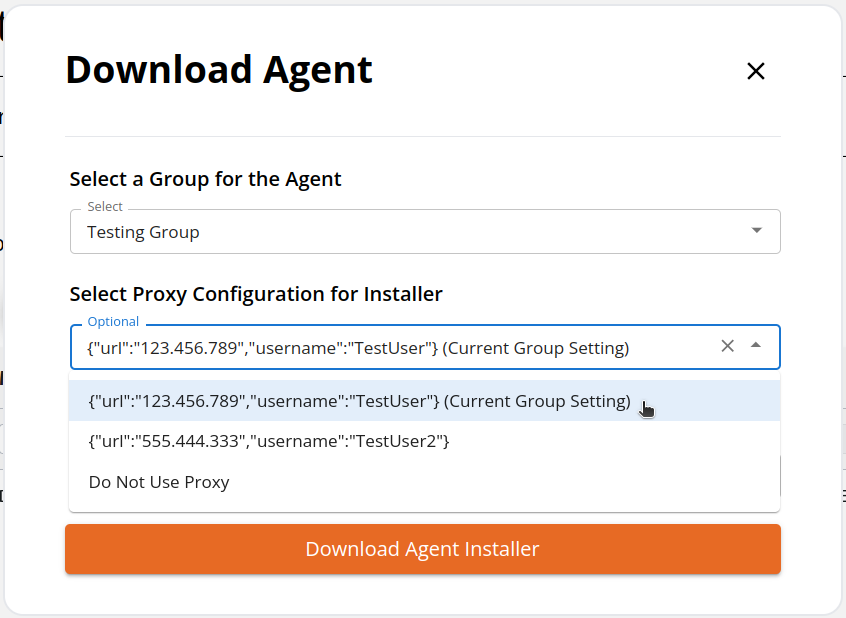When opting to use a proxy for the installer, the only possibly installer type is the Command Line Installer.
If you select the Do Not Use Proxy option, our normal installer type options will appear.
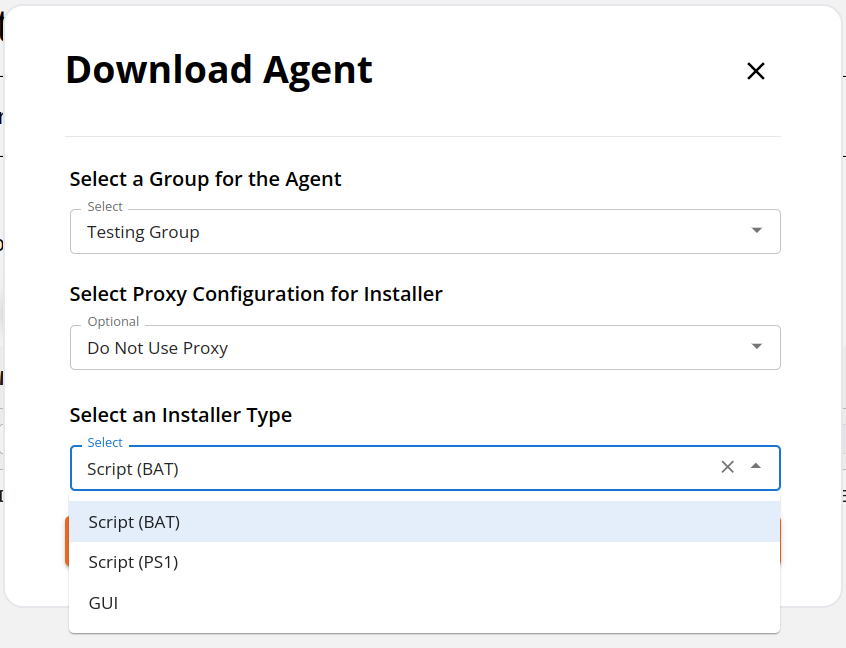Note that if you select a proxy configuration for the installer that is not the group’s current setting, the installer will run with the selected setting and then switch to the group’s current proxy configuration setting after installing.
# Where Can I See if an Agent is Able to Bypass the Proxy?
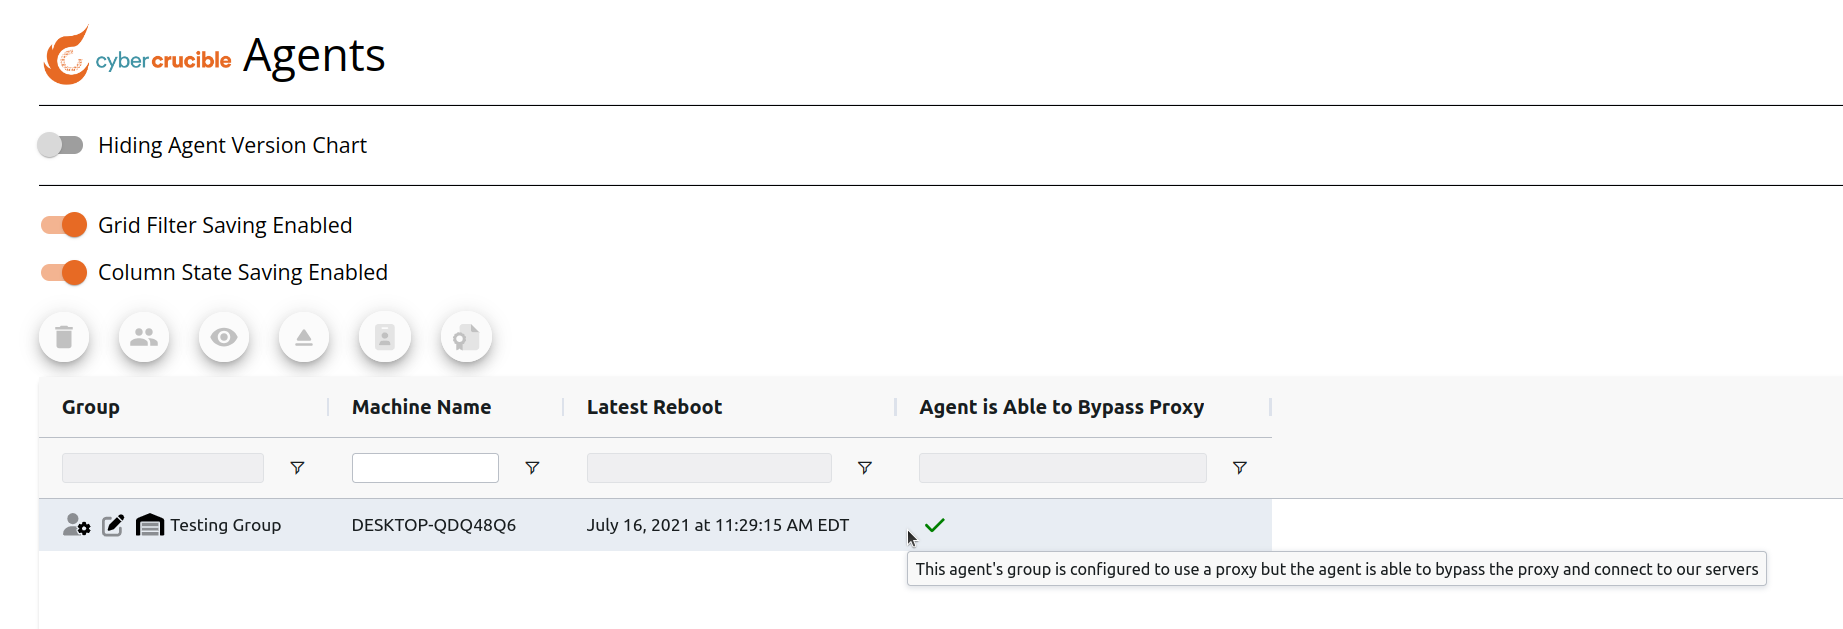
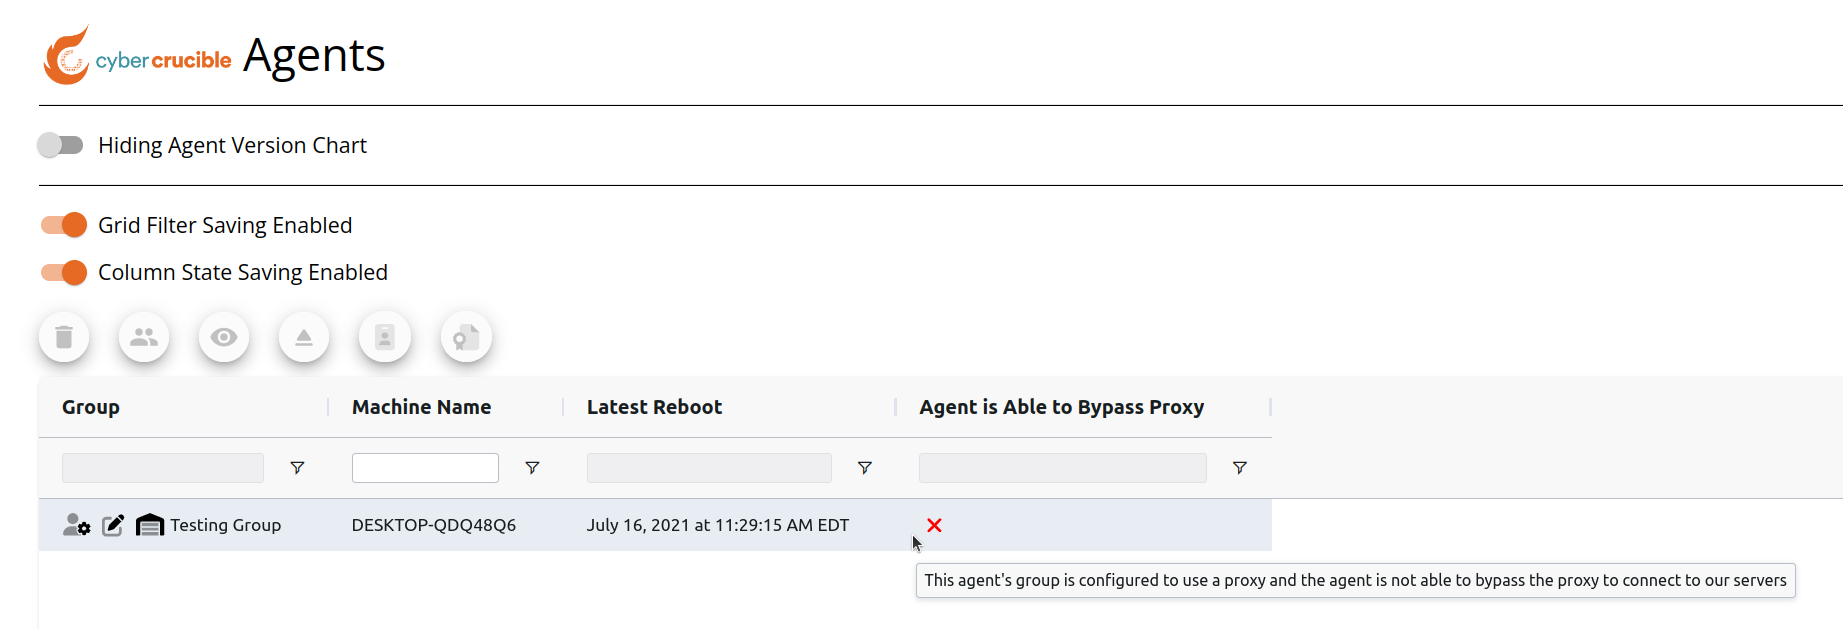
Users can view if agents can connect to our servers without using a proxy by first navigating to the Agents page found under the Operations tab in the sidebar. Then locate the Agent is Able to Bypass Proxy column on the grid.
Note that the Agent is Able to Bypass Proxy column will not be visible unless the user is a member of a group that has enabled agents in the group to use a proxy.
If the agent is in a group that has enabled the use of a proxy and the agent cannot bypass the proxy to connect to our servers, the red x will be shown in the column. See an example of this below:
If the agent is in a group that has enabled the use of a proxy and the agent is able to bypass the proxy and connect to our servers normally, the green check-mark will be shown in the column. See an example of this below: